If you have a WordPress site, you may be thinking of creating custom user login and registration pages to collect more information. For example, you might ask users to specify their location or submit a brief bio. However, you’re probably wondering how to do this without touching a line of code.
Fortunately, you can use a WordPress user registration plugin like Profile Builder Pro. This enables you to easily customize your login and registration forms. It also gives you more control over the user profile.
In WordPress design and development, some agencies, like Connective or a similar one, focus on providing solutions that merge aesthetics with functionality, ensuring that your custom forms work seamlessly and look appealing to your users.
In this post, we’ll take a closer look at why you might want to customize your WordPress user login, registration, and profile forms. Then, we’ll show you how to do this step by step using Profile Builder Pro. Let’s get started!
Why You Might Want to Create a Custom User Login, Registration, and Profile
By default, the WordPress user registration, login, and profile forms are very basic. The same goes for the WooCommerce forms:
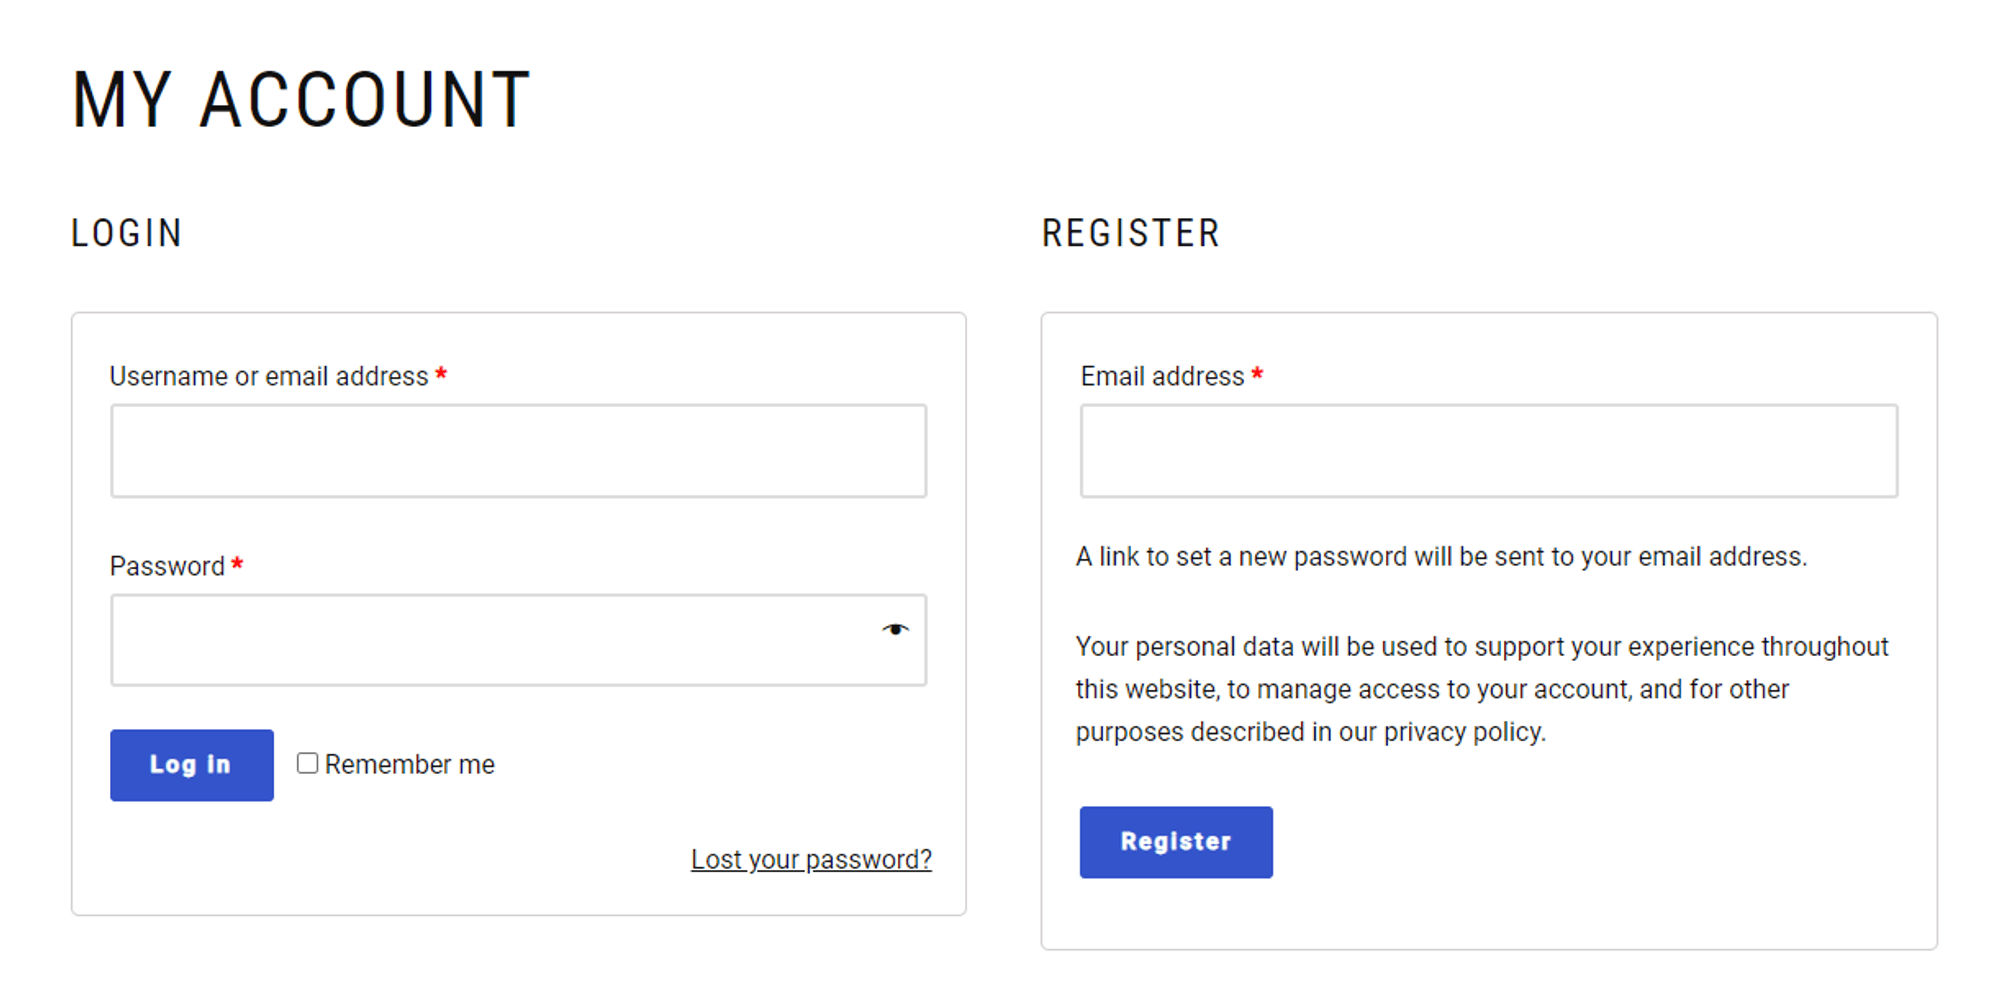
These forms can offer a good jumping-off point, but as a business owner, you might be interested to learn more about your audience. For example, collecting information such as their location and language could help you optimize your marketing efforts to target that particular demographic.
Customized registration and login forms offer a unique experience and align with your brand’s visual and tonal attributes. This consistent branding can foster a deeper emotional connection with users.
Offering features such as profile badges or achievements based on user activity can gamify the experience. This feature incentivizes users to engage more and provides a unique and fun interaction on your platform.
More importantly, custom avatars or tailored user profiles can significantly boost user interaction. When users feel a sense of ownership and connection, they’re more likely to be actively involved.
Additionally, you might want to secure your forms with Two-Factor Authentication (2FA). This will help prevent malicious actors from infiltrating your site.
There are other ways you could customize the login or registration page. For instance, you can redirect users to particular pages on your site after they log in or register.
You might take them to your latest posts or your sales page. This way, you can use your login page to draw attention to specific products, articles, or offers, and drive more conversions.
Profile Builder Pro is the ideal plugin for creating custom WordPress user profile, login, and registration forms. It even lets you personalize your forms with conditional logic. This means the fields that users see will be based on their preferences and selections.
We’ll explore these features in more detail in the next section.
How to Create a Custom WordPress User Login, Registration, and Profile
Now, let’s look at how to customize your WordPress user login, registration, and profile forms.
Step 1: Install Profile Builder Pro
First, you’ll need to purchase the Profile Builder Pro plugin. Then, log into your account and go to Downloads. Here, you’ll find the files for the plugin you’ve just purchased:
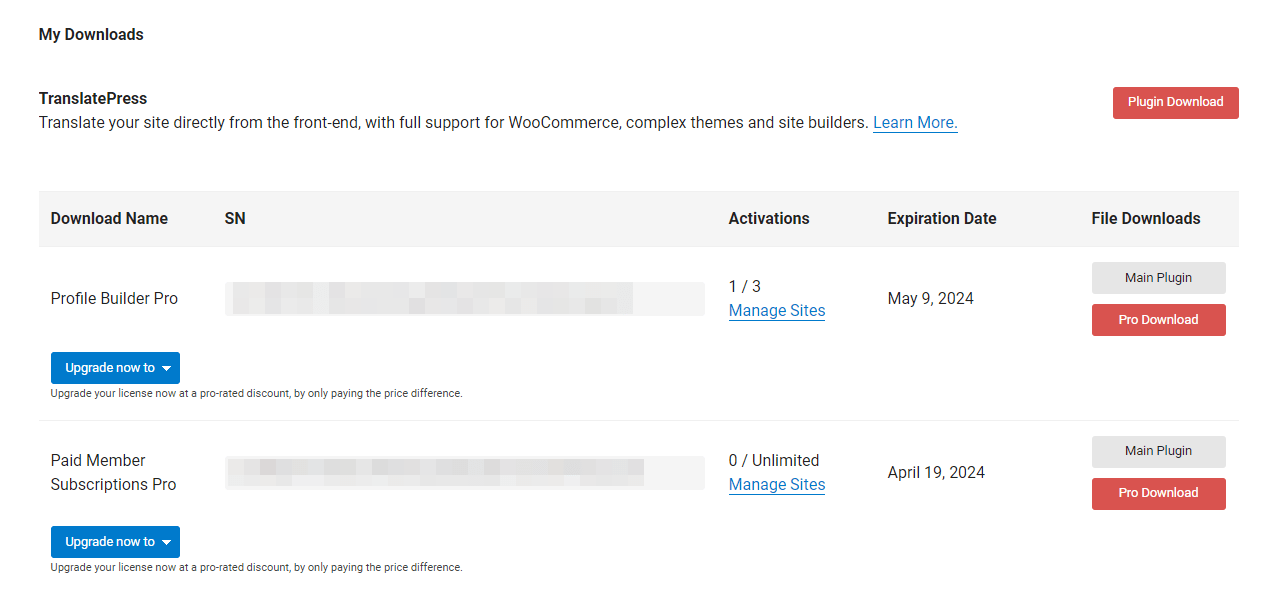
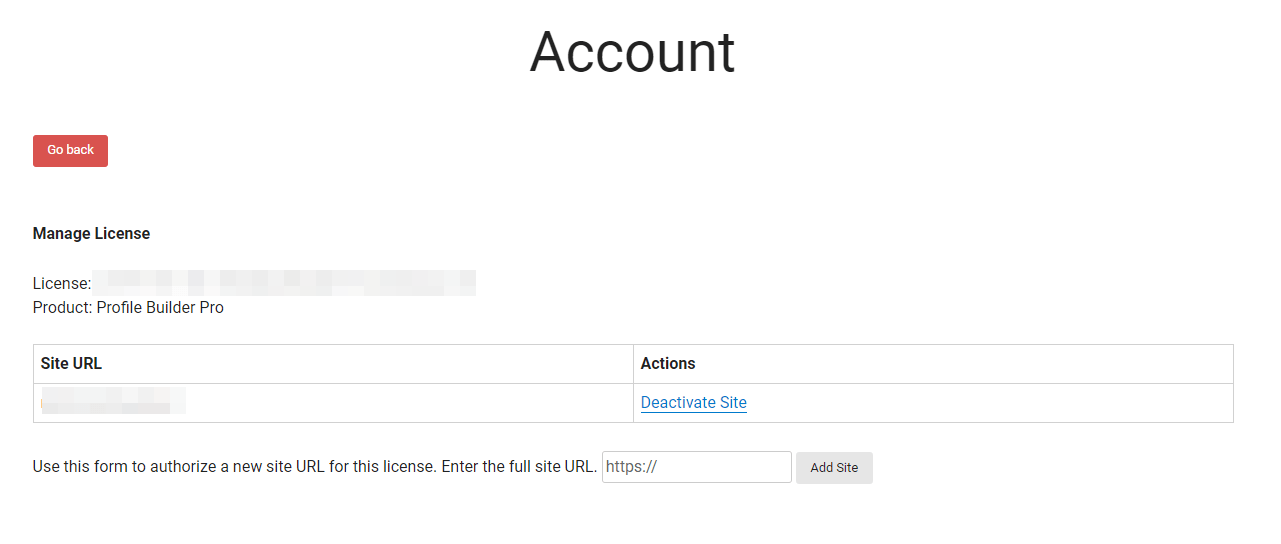
Download the Main and the Pro plugins to save the file to your computer. Then, select Manage Sites and enter the URL of the site you want to activate the plugin on:
Now, log into your WordPress site and navigate to Plugins → Add New. Then, click on the Upload Plugin button and choose the files you’ve just downloaded one by one:
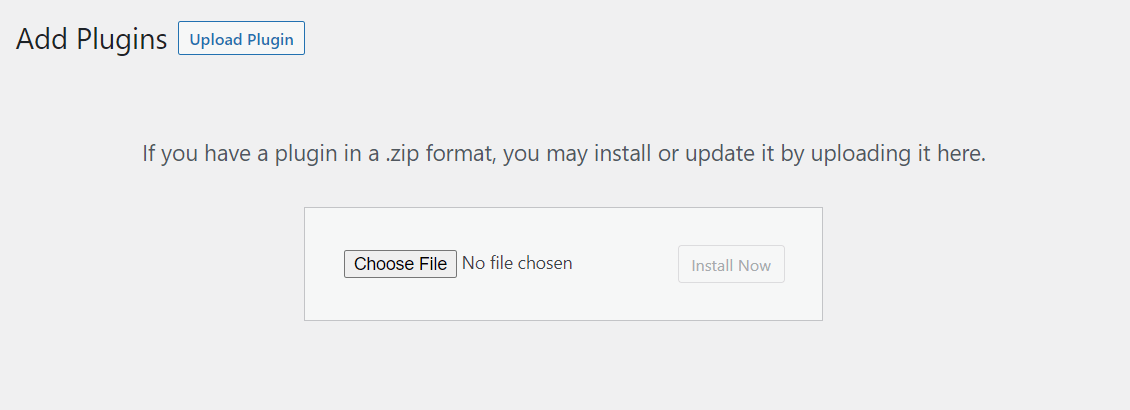
Select Install Now, followed by Activate. You should now see Profile Builder in your dashboard menu. Click on it and go to Register Version. Here, you’ll need to enter the license key for your plugin:
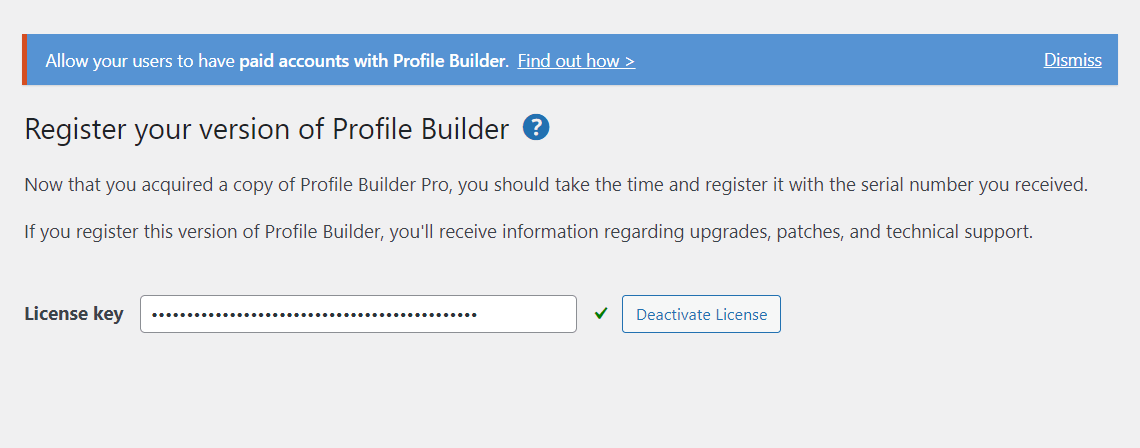
You’ll find the license key in your Profile Builder account. Once you’ve activated it, you can start working on your login and registration pages.
Profile Builder Pro can automatically create the form pages for you:
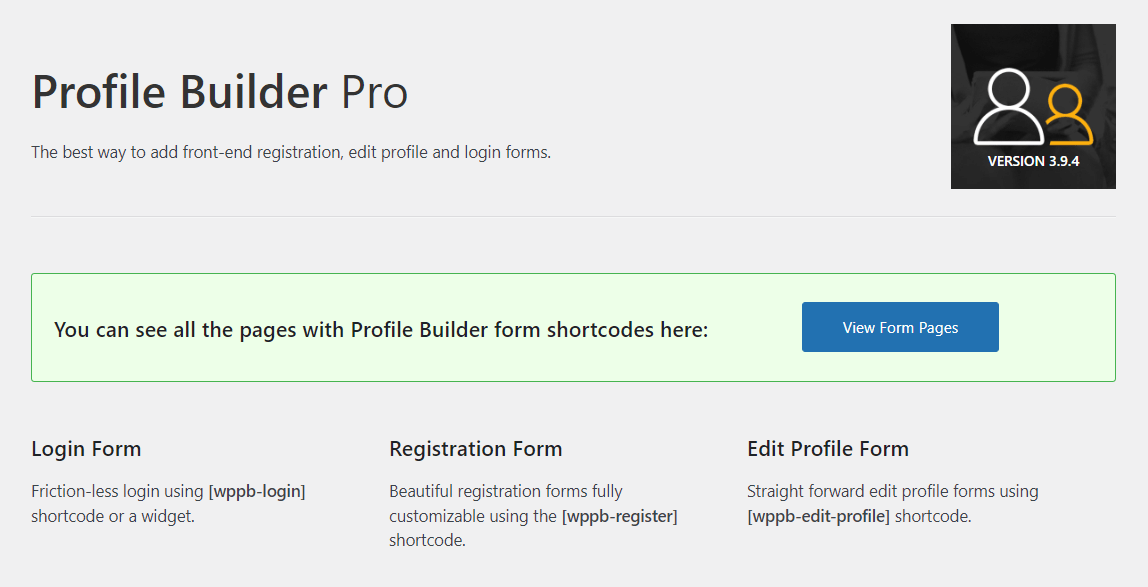
All you have to do is click on Create Form Page, and it will add the WordPress user login, registration, and profile forms to the respective pages.
New Integrations: With the Pro version, you can expect integrations with popular plugins like WooCommerce and BuddyPress, allowing seamless connections and enhanced user management.
Email Customizations: Personalize the email notifications sent out during user registrations or other profile-related activities, ensuring your brand’s voice is consistent.
Advanced Fields: Dive into advanced fields like Avatar Upload, GDPR Consent, and more to ensure your forms collect precisely what you need.
Next, we’ll show you how to configure and customize these forms.
Step 2: Configure Your WordPress Forms
Let’s start by configuring some settings for your WordPress forms. Navigate to Profile Builder → Settings and select a form design:
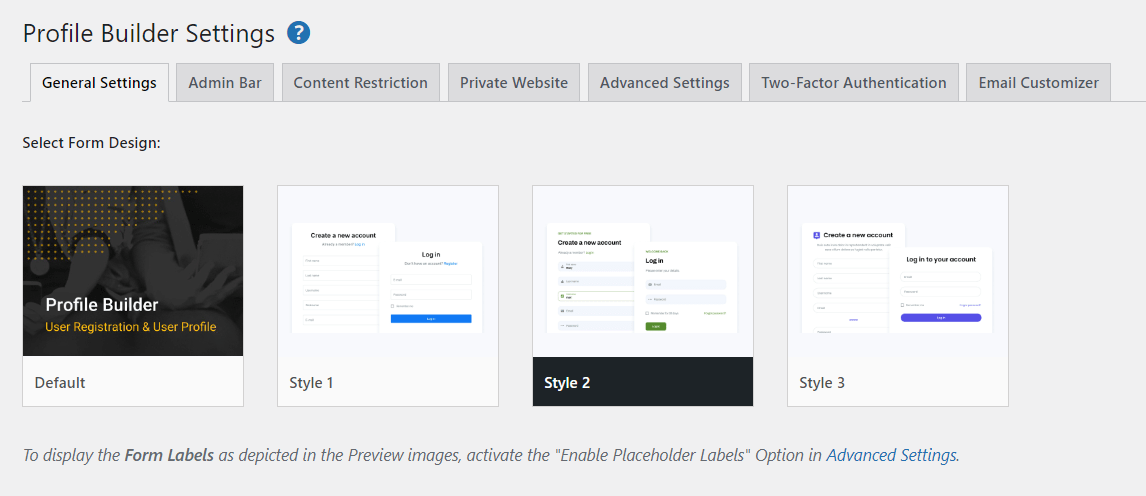
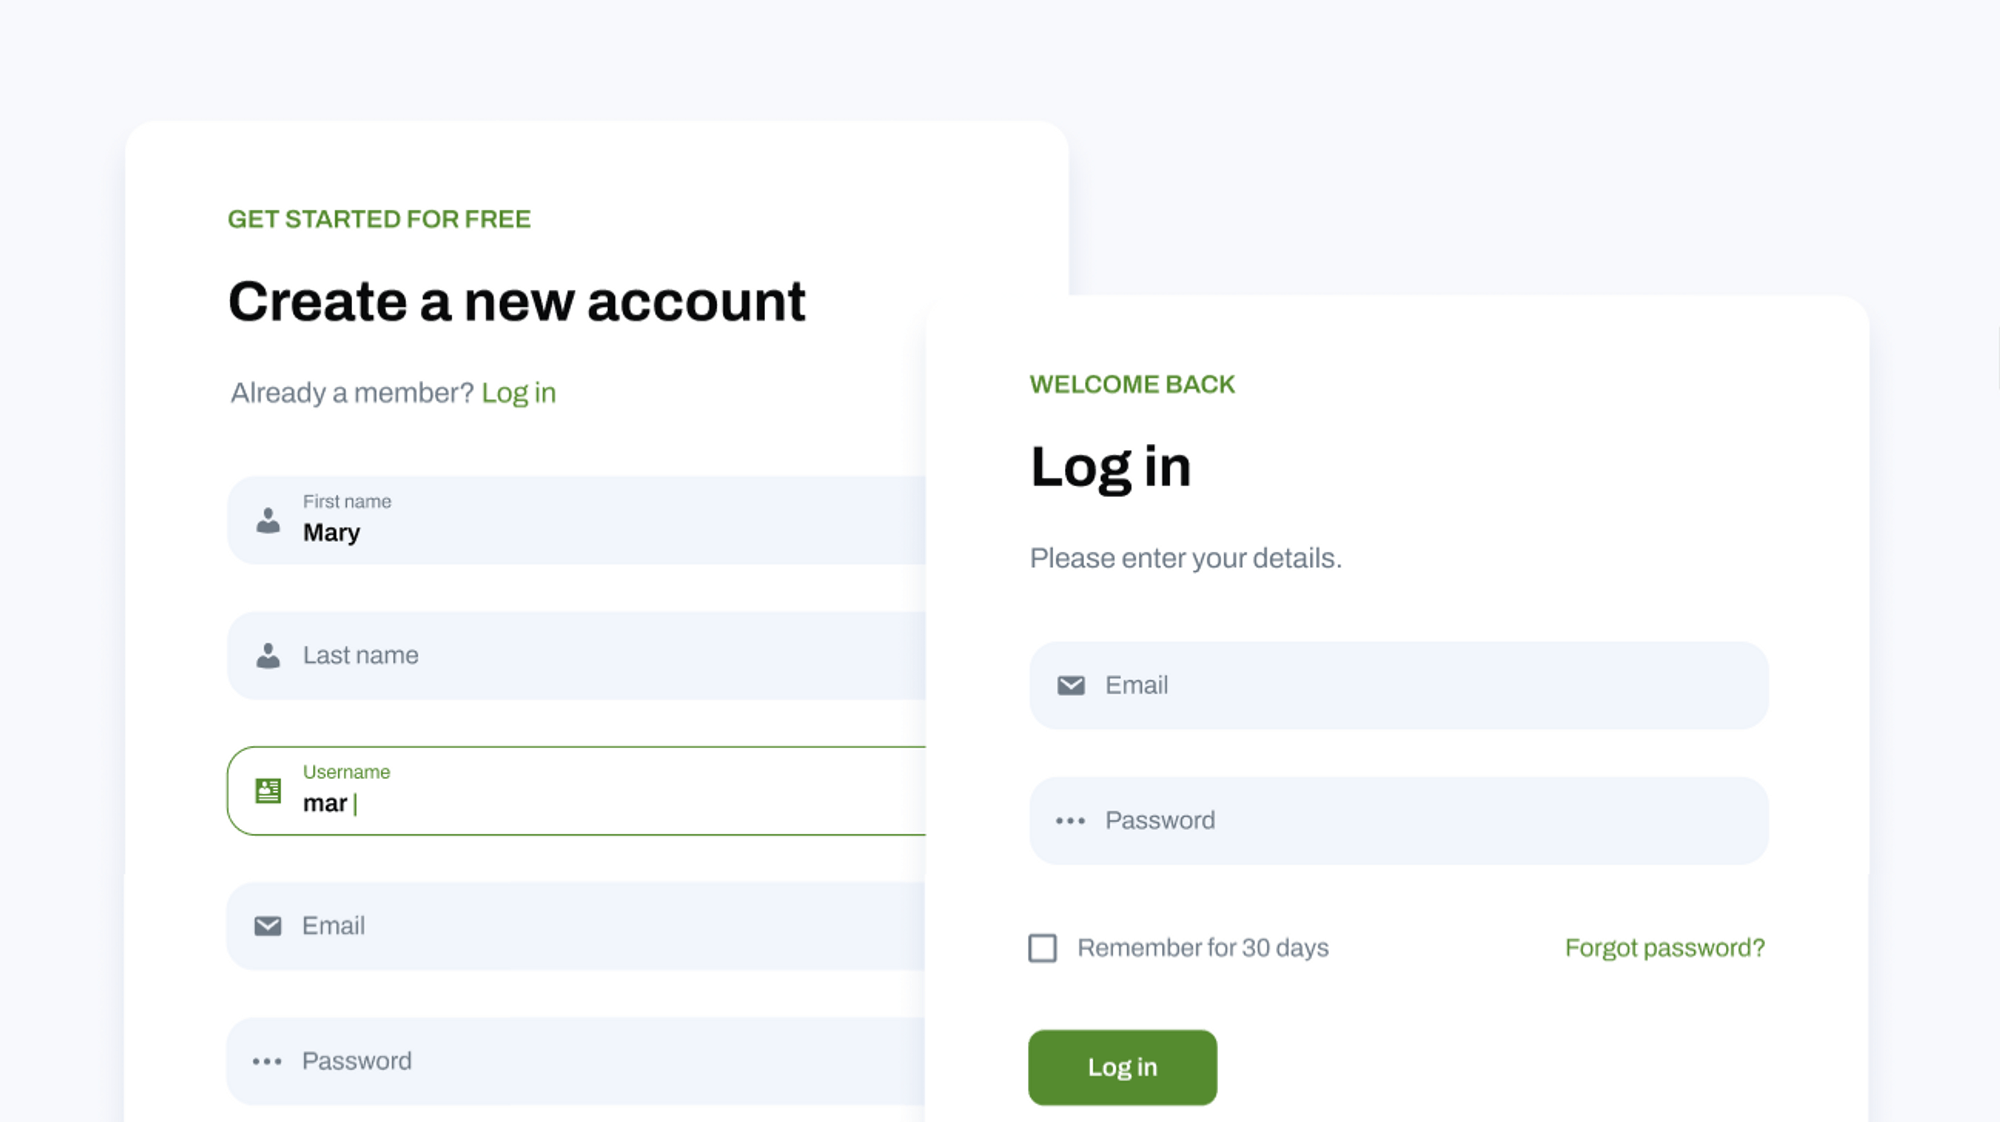
For example, you could choose Style 2 as your form style and your front-end user forms will look something like this:
Then, you can configure some settings for your login and registration pages. For example, you can automatically log in new users after registration, activate admin approval for new registrations, and allow users to log in with their username or email only:
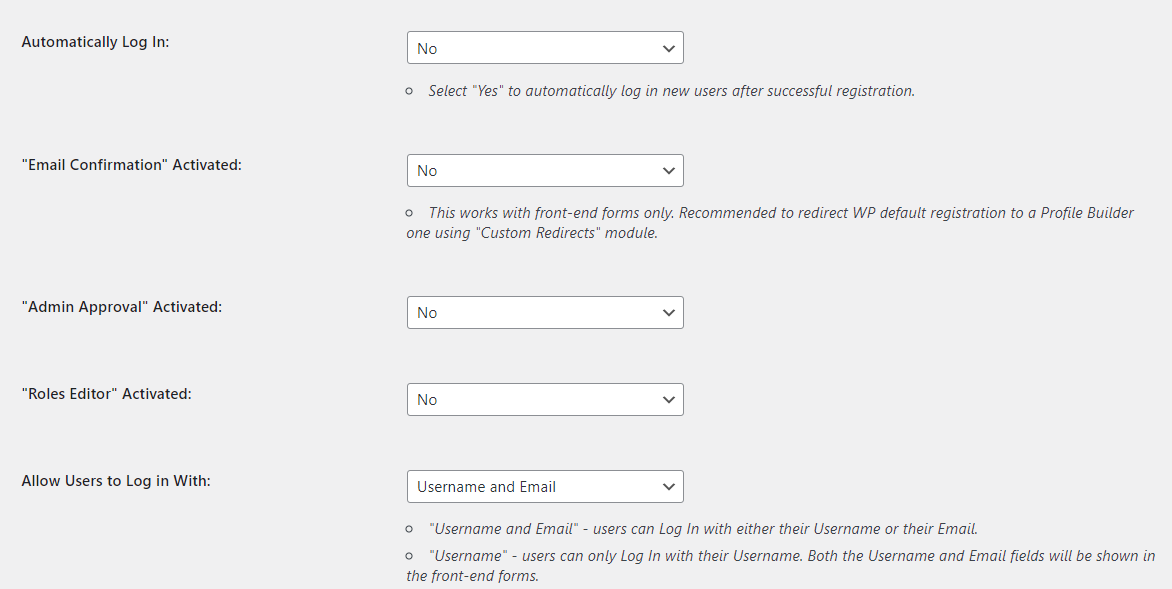
You can even enforce strong passwords by specifying a minimum length and strength level. Once you’re ready, click on Save Changes.
If you want to make your site more secure, you can navigate to the Two-Factor Authentication tab and enable this feature on your site. You might even want to enable it for specific users only, like customers and subscribers:
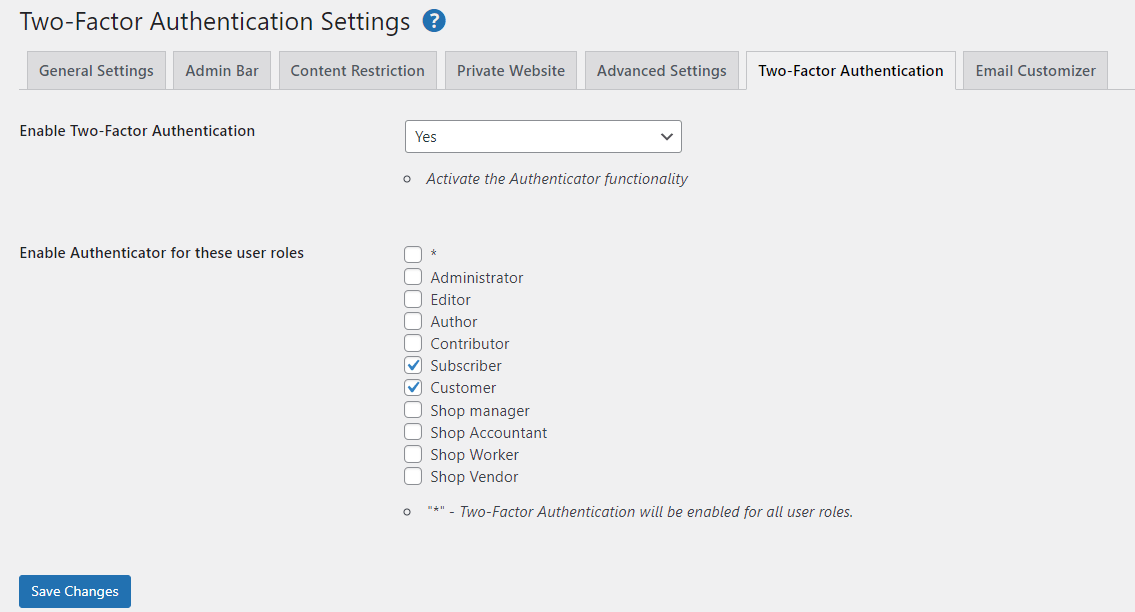
If you navigate to Advanced Settings, you can enable even more features for your forms. For instance, if you select the Fields tab, you’ll see an option to Automatically generate password for users:

You’re also able to ban certain words from being used in fields, prevent users from using display names that already exist, and more. Take your time to explore the available settings and options, but remember to save your changes before moving on to another tab.
If you want to direct users to a specific page after they register or log in, you’ll need to activate the relevant module. Go to Profile Builder → Add-Ons and look for Custom Redirects*.* Select the box next to it and then hit Activate:
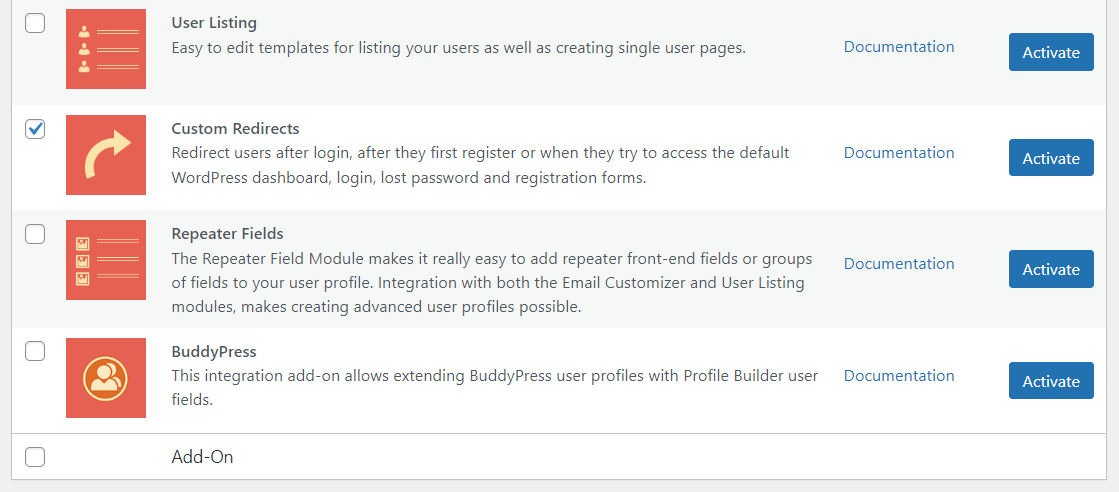
Now, go to Profile Builder → Custom Redirects. As you may notice, you can set up redirects for individual users or according to user role:
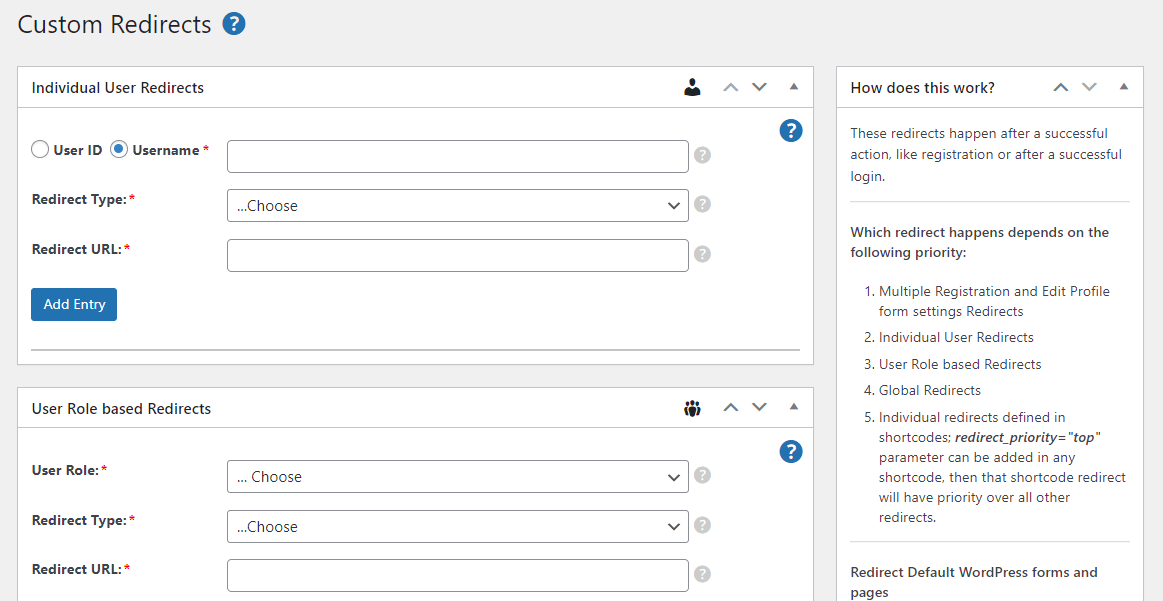
In our case, we’ll be setting up global redirects. Start by choosing a redirect type (such as After Login or After Registration):
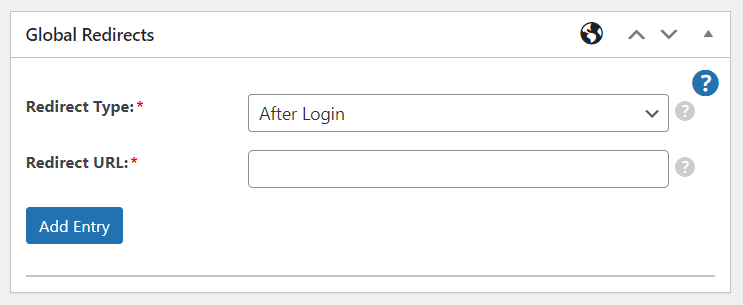
Then, enter the URL you want to redirect users to, and click on Add Entry. You can create multiple redirects.
Step 3: Customize the Form Fields
To customize the fields for your WordPress user registration form, navigate to Profile Builder → Form Fields. Here, you’ll see a list of the fields that your form currently displays:
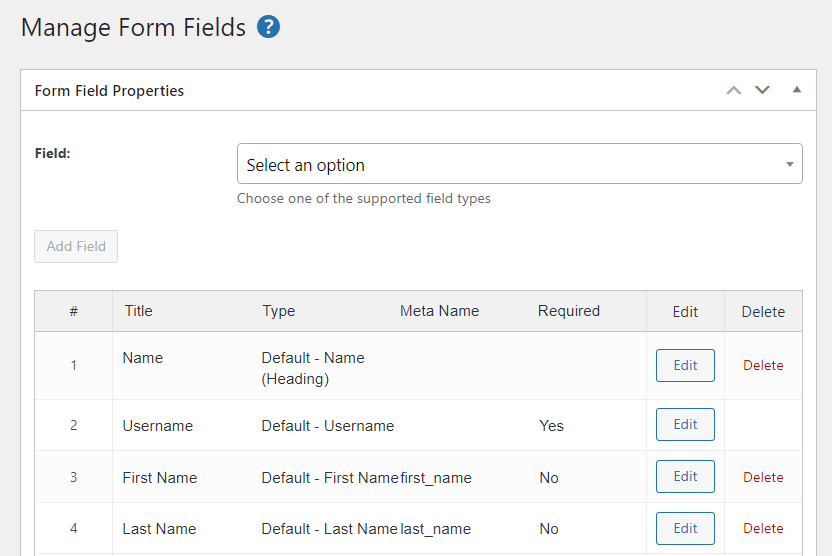
You can click on Edit to customize an individual field or Delete to remove it from the form. To add a new field, use the dropdown menu to select an option.
For example, you might want to ask users to select their country. Profile Builder will ask you to enter some details about this field, such as a title and meta name:
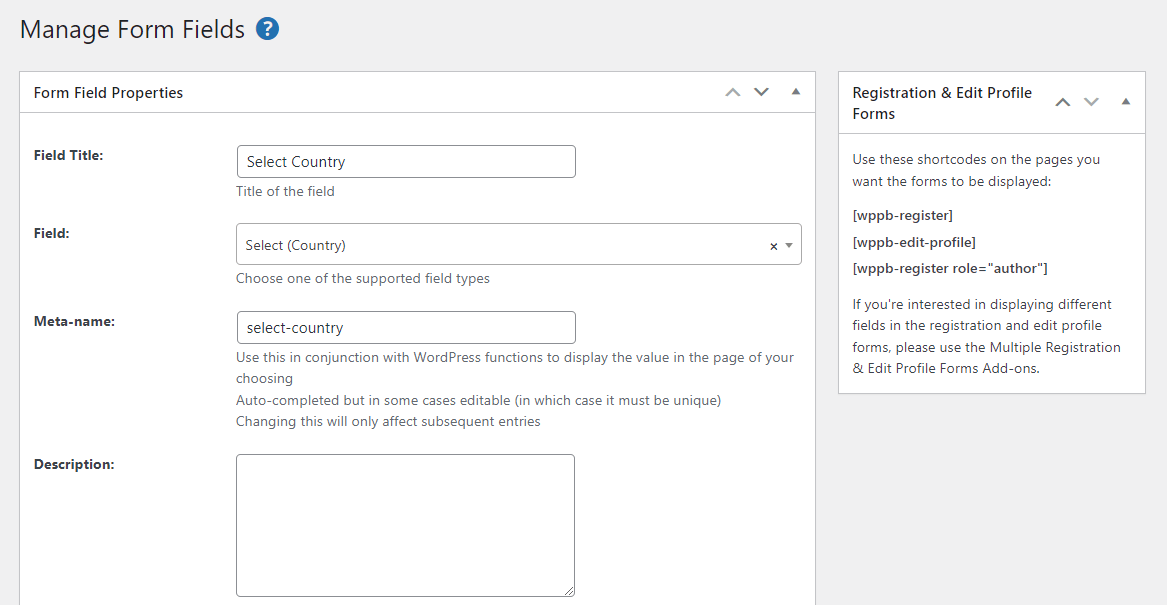
You can even make this a required field. When you’re ready, click on Add Field. This will now be added to your WordPress user registration form.
Earlier, we mentioned conditional logic. This is when a field is displayed to users based on information they entered in previous fields.
For example, you might only want to ask users for their website if they selected United States as their country. To do this, click on the Edit button for the Website field. Then, check the box for Enable conditional logic:

Using the dropdown menu, select the field that this entry will be dependent on (in our case, Select Country), and then specify the input (e.g., United States).
Here’s what the result will look like:

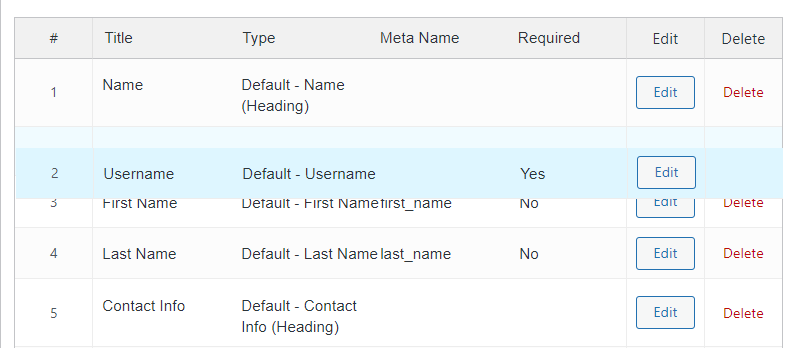
Note that you can also rearrange the order in which your fields appear. To do this, simply hover over the number of your field and drag it into your desired position:
If you want to create multiple registration forms for different types of users, go to Profile Builder → Add-Ons and click to activate the Multiple Registration Forms module:
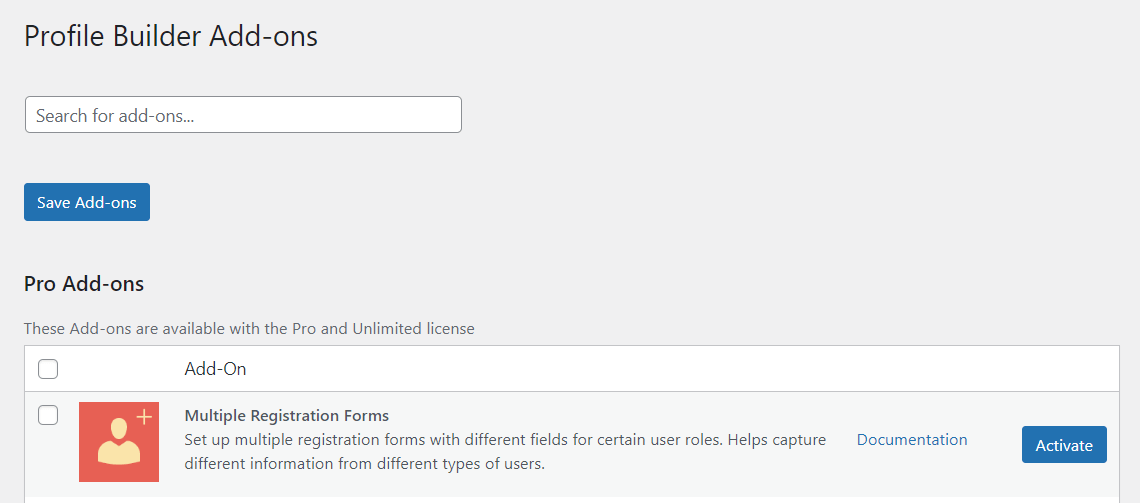
This feature is particularly useful if you cater to different types of users or customers. For example, you might sell to businesses as well as individuals.
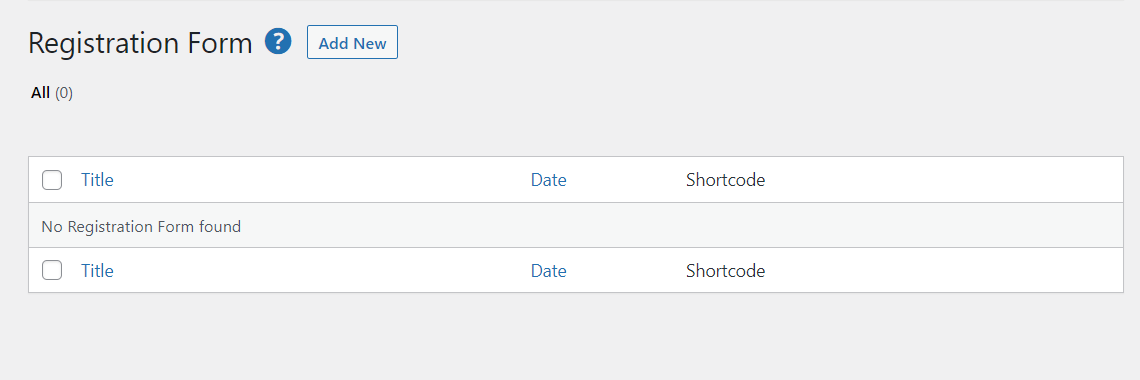
Once you activate the module, go to Profile Builder → Registration Forms and click on Add New:
Then, you’ll need to enter a name for your form, configure some settings, and customize the fields (as shown earlier):
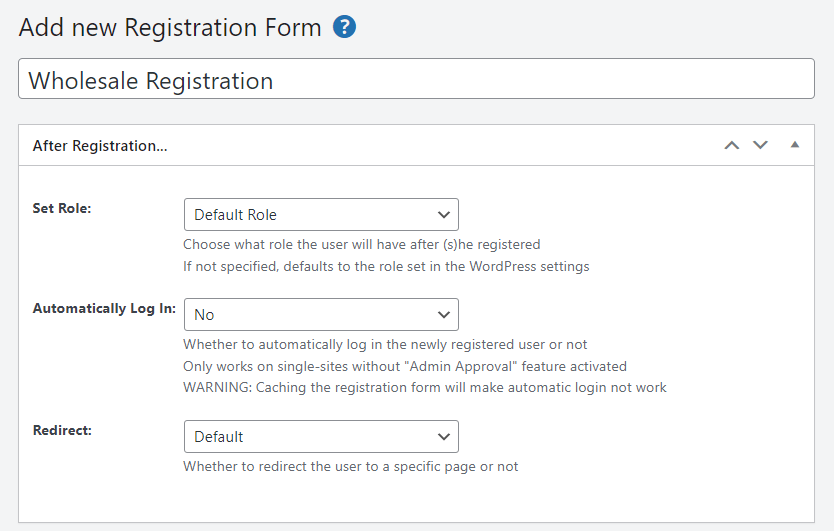
When you’re ready, click on Publish. Next, we’ll look at how to add these forms to your website.
Step 4: Add the Forms to Your Pages
As we mentioned earlier, Profile Builder Pro can automatically add the form shortcodes to your login, registration, and profile pages. That means, whenever you modify these forms, the changes will be reflected on the front end.
However, you might also decide to add these forms to other areas of your site. For instance, you might want to customize the WooCommerce login page and WooCommerce register form.
There are two ways to do this: using a shortcode or a dedicated block.
First, open the page where you’d like to display your forms. If you want to use them for your online shop, you’ll need to edit the My Account page that was created when you installed WooCommerce. Alternatively, you might decide to create a new page.
If you’re using the existing WooCommerce page, you’ll need to delete the default login and registration forms. Simply select the shortcode and delete it:
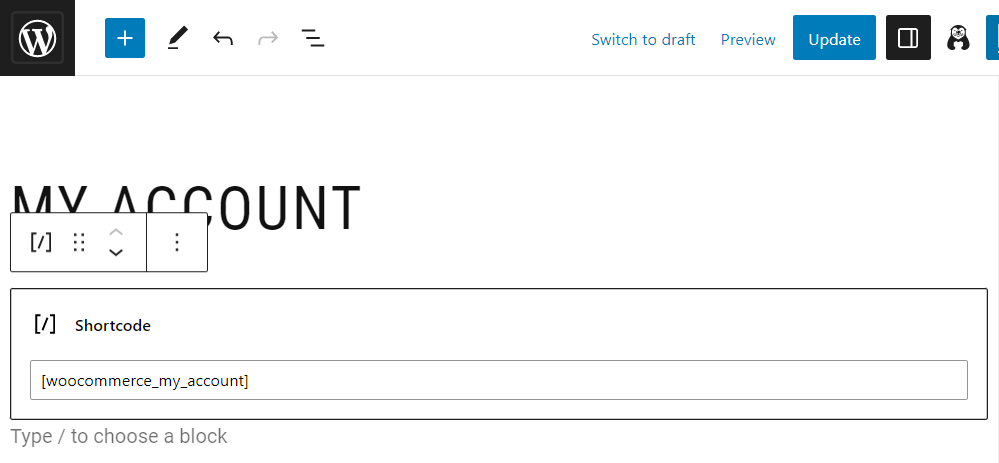
Now, to add your custom forms, click to add a new block and look for Register or Login:
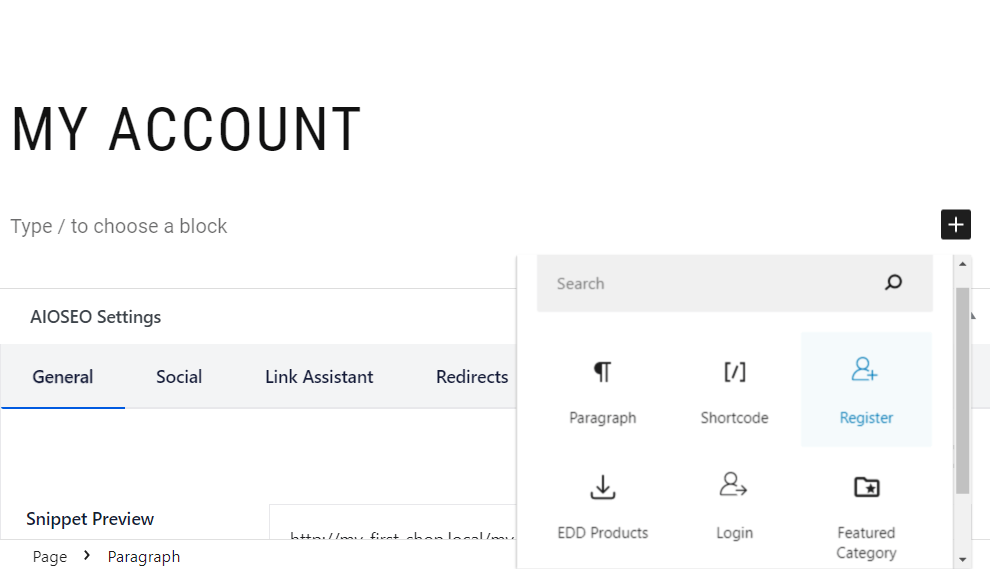
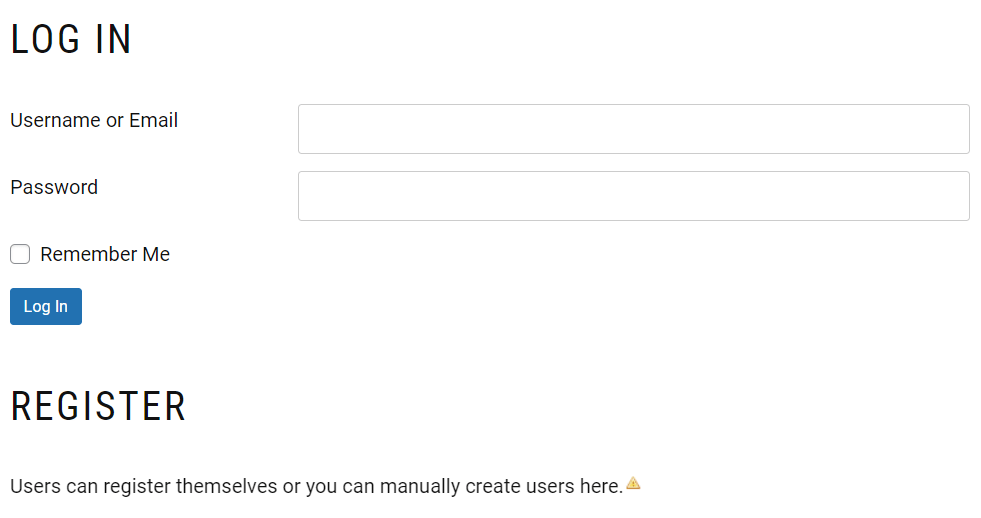
In this tutorial, we’ll be adding both forms to this page. We’ve also added a heading for each form:
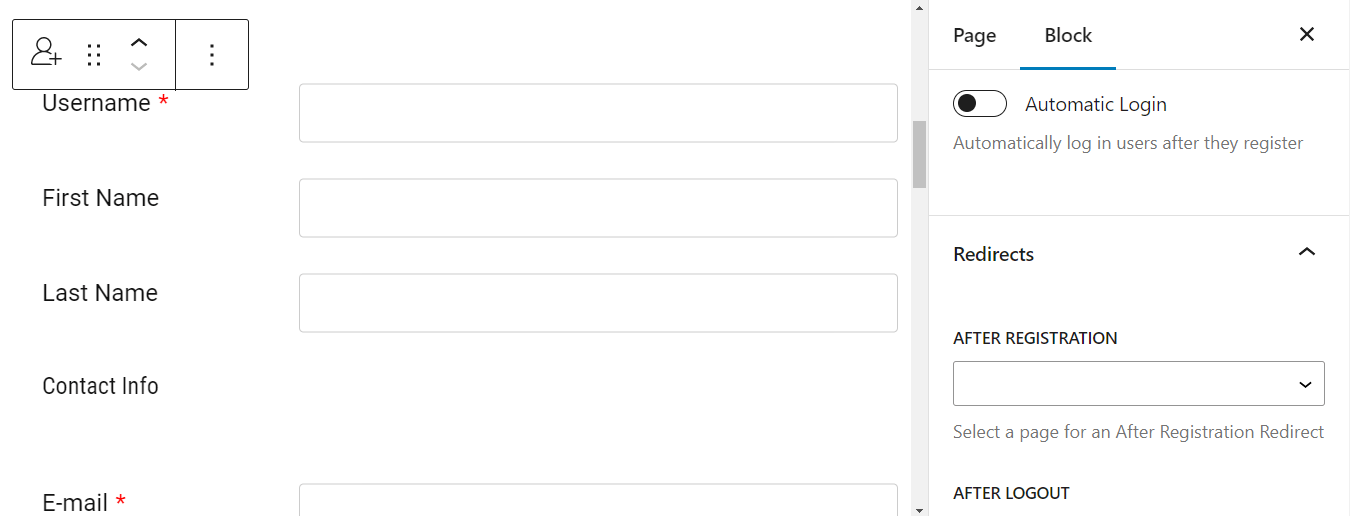
You’ll also get some configuration settings for each block. For example, if you select the register form, you can enable automatic login after registration, set up a redirect, and more:
If you’ve created multiple registration forms, navigate to Form Settings and use the dropdown menu to choose the form you want to display:
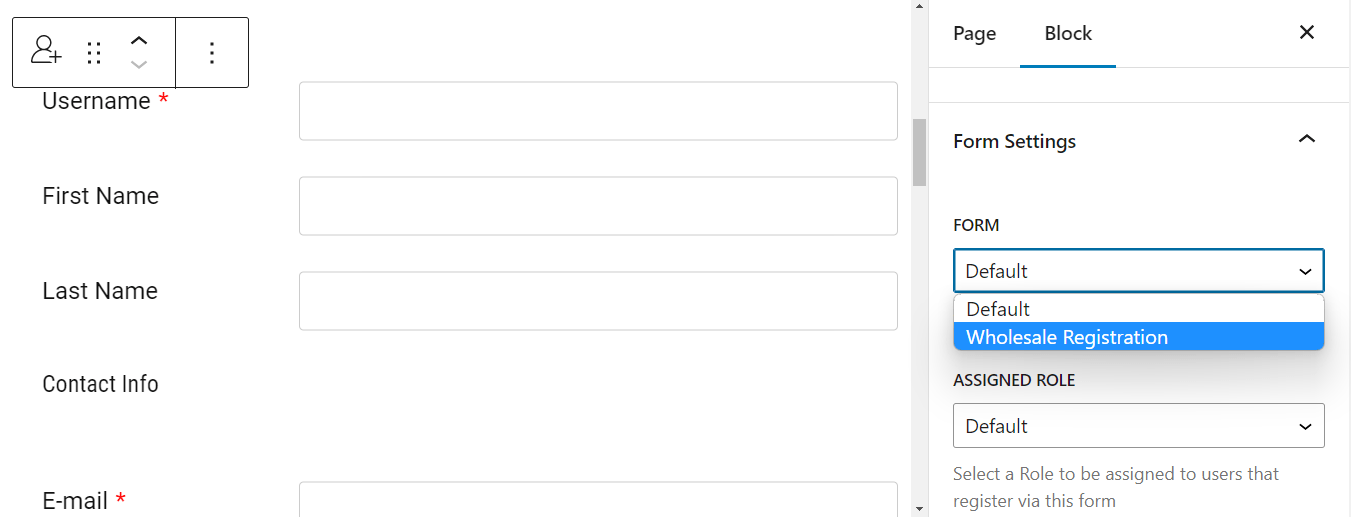
Under **Assigned Role, you can choose the role that will be assigned to users who register through this form. For example, if it’s a wholesale registration form, you might assign the wholesale customer role to these users.
When you’re ready, click on Update (or Publish if you created a new page). Then, you can visit the page on the front end to see what your forms look like to your customers:
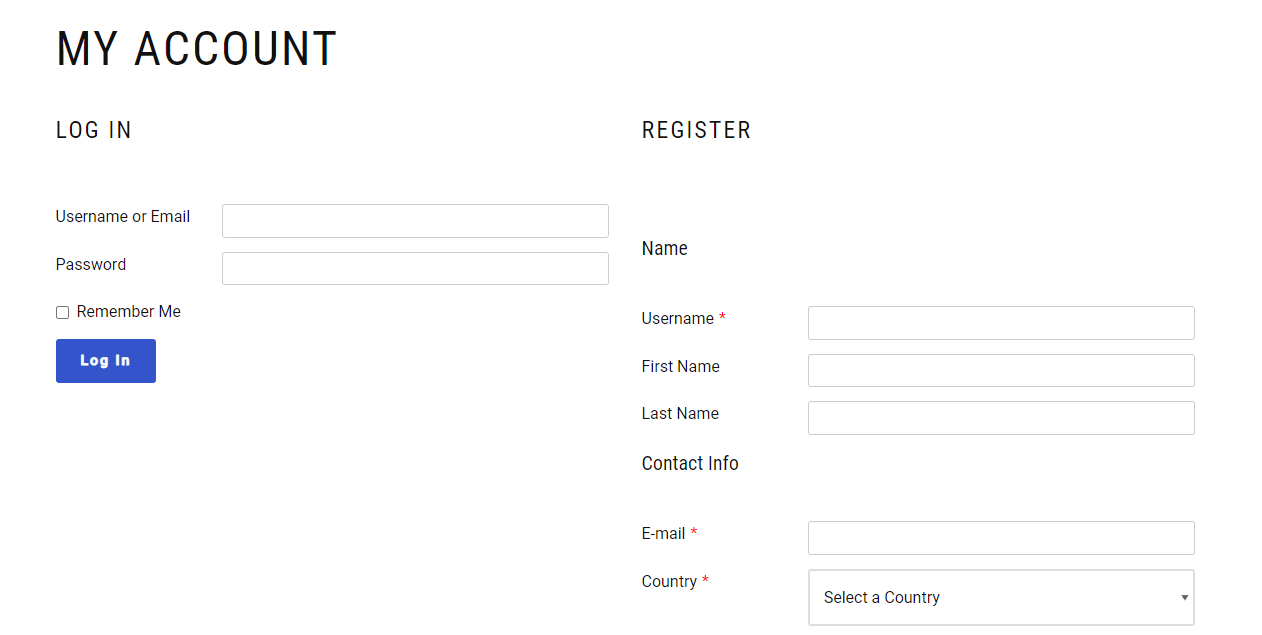
Note that for this example we’ve used the default form styling, but you can choose any one of the pre-designed templates for your forms in order to make them stand out and look professional.
You can also add your forms with a shortcode. This can be particularly useful if you’ve created your pages with a page builder other than the Block Editor.
You can locate these shortcodes in Profile Builder → Basic Information. Just copy and then paste them on your desired page!
Step 5: Customize the Profile Forms
Finally, you can customize WordPress user profile forms so that users have more control over their details. To do this, you’ll need to activate the Multiple Edit Profile Forms module:
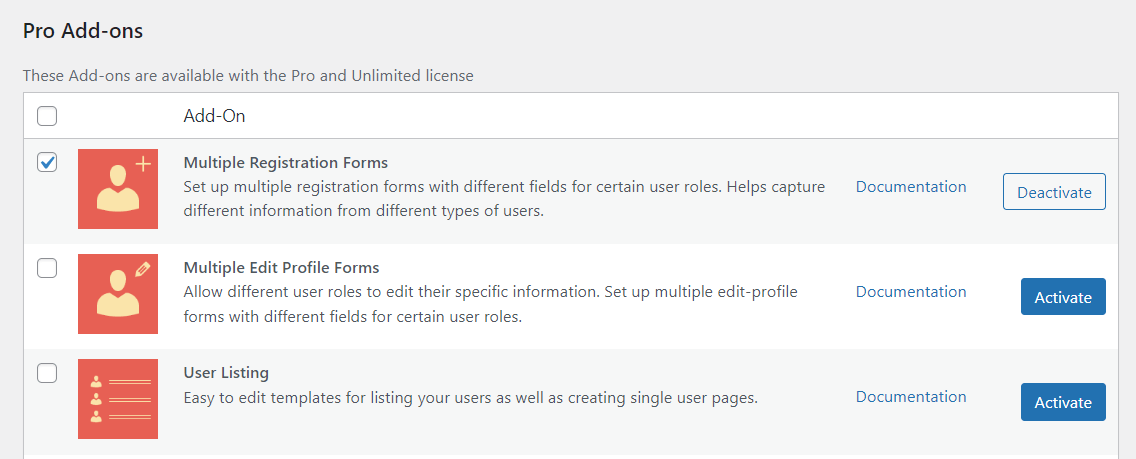
Then, go to Profile Builder → Edit-profile forms → Add new:

Then, you can just customize the form as shown earlier. For instance, you can add a redirect and create new fields, or edit existing ones. When you’re done, hit Publish.
Conclusion
The default WordPress forms are pretty basic. If you want to collect more details about your audience or provide a tailored user experience, you’ll have to customize these forms. You could also enforce strong passwords and two-factor authentication on these forms to make your site more secure.
To recap, here’s how you can create custom WordPress forms for login and registration:
- Install Profile Builder Pro.
- Configure your WordPress forms.
- Customize the form fields.
- Add the forms to your pages.
- Customize the user profile.
As the digital landscape evolves, the need for personalized and secure user experiences becomes paramount. With Profile Builder Pro, you get a streamlined installation process and a suite of tools that optimize your WordPress forms to their fullest potential. From custom integrations to advanced field additions, this plugin bridges the gap between standard functionalities and tailored user interactions.
By investing in this comprehensive solution, website owners can elevate their brand, safeguard user data, and cultivate a more engaged community. Leap into next-gen WordPress user management with Profile Builder Pro.
Do you have any questions about creating a custom WordPress user login, registration, or profile? Let us know in the comments section below!
