Want to create a good-looking document gallery in WordPress?
A content-rich WordPress website is not only written in words but also showcases plenty of media, documents, and graphics.
When you want to share those contents, you can’t upload them to the WordPress media library. Or when you managed to do it, it looks kind of austere and unappealing to readers. They might think that is some issue or harmful file and hesitate to click on it.
This article will help you successfully upload those necessary file types. And display them nicely on any WordPress page or post gallery.
Uploading Document File Types to WordPress
What’s allowed to be uploaded and what’s not?
WordPress by default allows many document file types:
- .pdf (Portable Document Format)
- .doc, .docx (Microsoft Word Document)
- .ppt, .pptx, .pps, .ppsx (Microsoft PowerPoint Presentation)
- .odt (OpenDocument Text Document)
- .xls, .xlsx (Microsoft Excel Document)
- .psd (Adobe Photoshop Document)
Those are the most widely used file types. But if you need to upload a document file type that is not supported, you can easily get the know-how below.
WordPress 5.8 adds WebP support
Also, it’s worth mentioning that WordPress 5.8 adds new fields to Site Health to help determine if a site is capable of processing WebP format image files. And you can also manage these WebP files efficiently with the FileBird plugin.
In my personal experience, I often use these ebook formats including .prc, .epub, .mobi, .azw, .djvu, etc. Despite not being common, those file types have been existing for a very long time and actually got many advantages in terms of sharing among platforms and reading user experience on different devices.
Or when designers want to upload their graphic files such as .svg, .cad, .dwg, motion graphic files, etc. And Apple documents such as .numbers, .pages, and so on?
Upload unpermitted document file types
To allow those file types to be uploaded, you got to install some WordPress pre-built code to implement it, and here I choose File Upload Types. This is a fast and direct solution.

Right after activation, you’ll see a list of file formats that are well categorized in different functionality and media types.
A quick tip: You can use Ctrl + F (or Cmd + F) to search for the file type/format you want.
So when I want to get webp file types, I can easily locate them and tick the corresponding checkbox. Then all I have to do is to click Save changes and carry on uploading those files. Yayks!
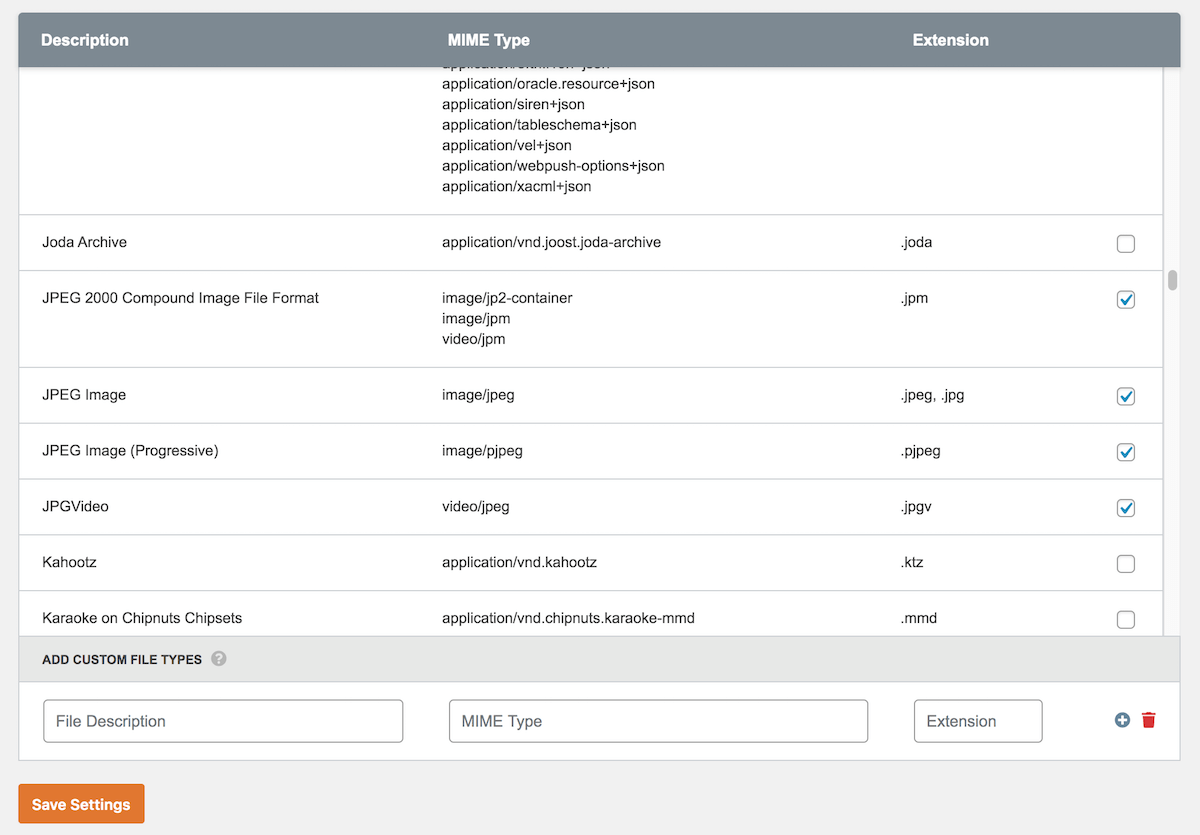
Another good thing about this plugin is it allows you to add custom file types. It’s just as easy as shown in the screenshot above. Just fill in those fields, including the file description, MIME type, and its extension, and then you’re good to go.
We won’t have to refresh or leave the page in order to complete those tasks. But of course, make sure you click Save Settings after making changes.
When you finish uploading all the necessary file types, we move on to the next step of adding those files to a document gallery.
How to Create a Document Library with FileBird and Gutenberg
1. Organize Your Documents in Folders
This tutorial is about how to post a document gallery page in the WordPress Gutenberg block editor.
These are the prerequisites to make this guide work for you:
- FileBird version 5.0 or higher (Lite version or FileBird Pro)
- FileBird Document Library (Free download)
- Gutenberg editor
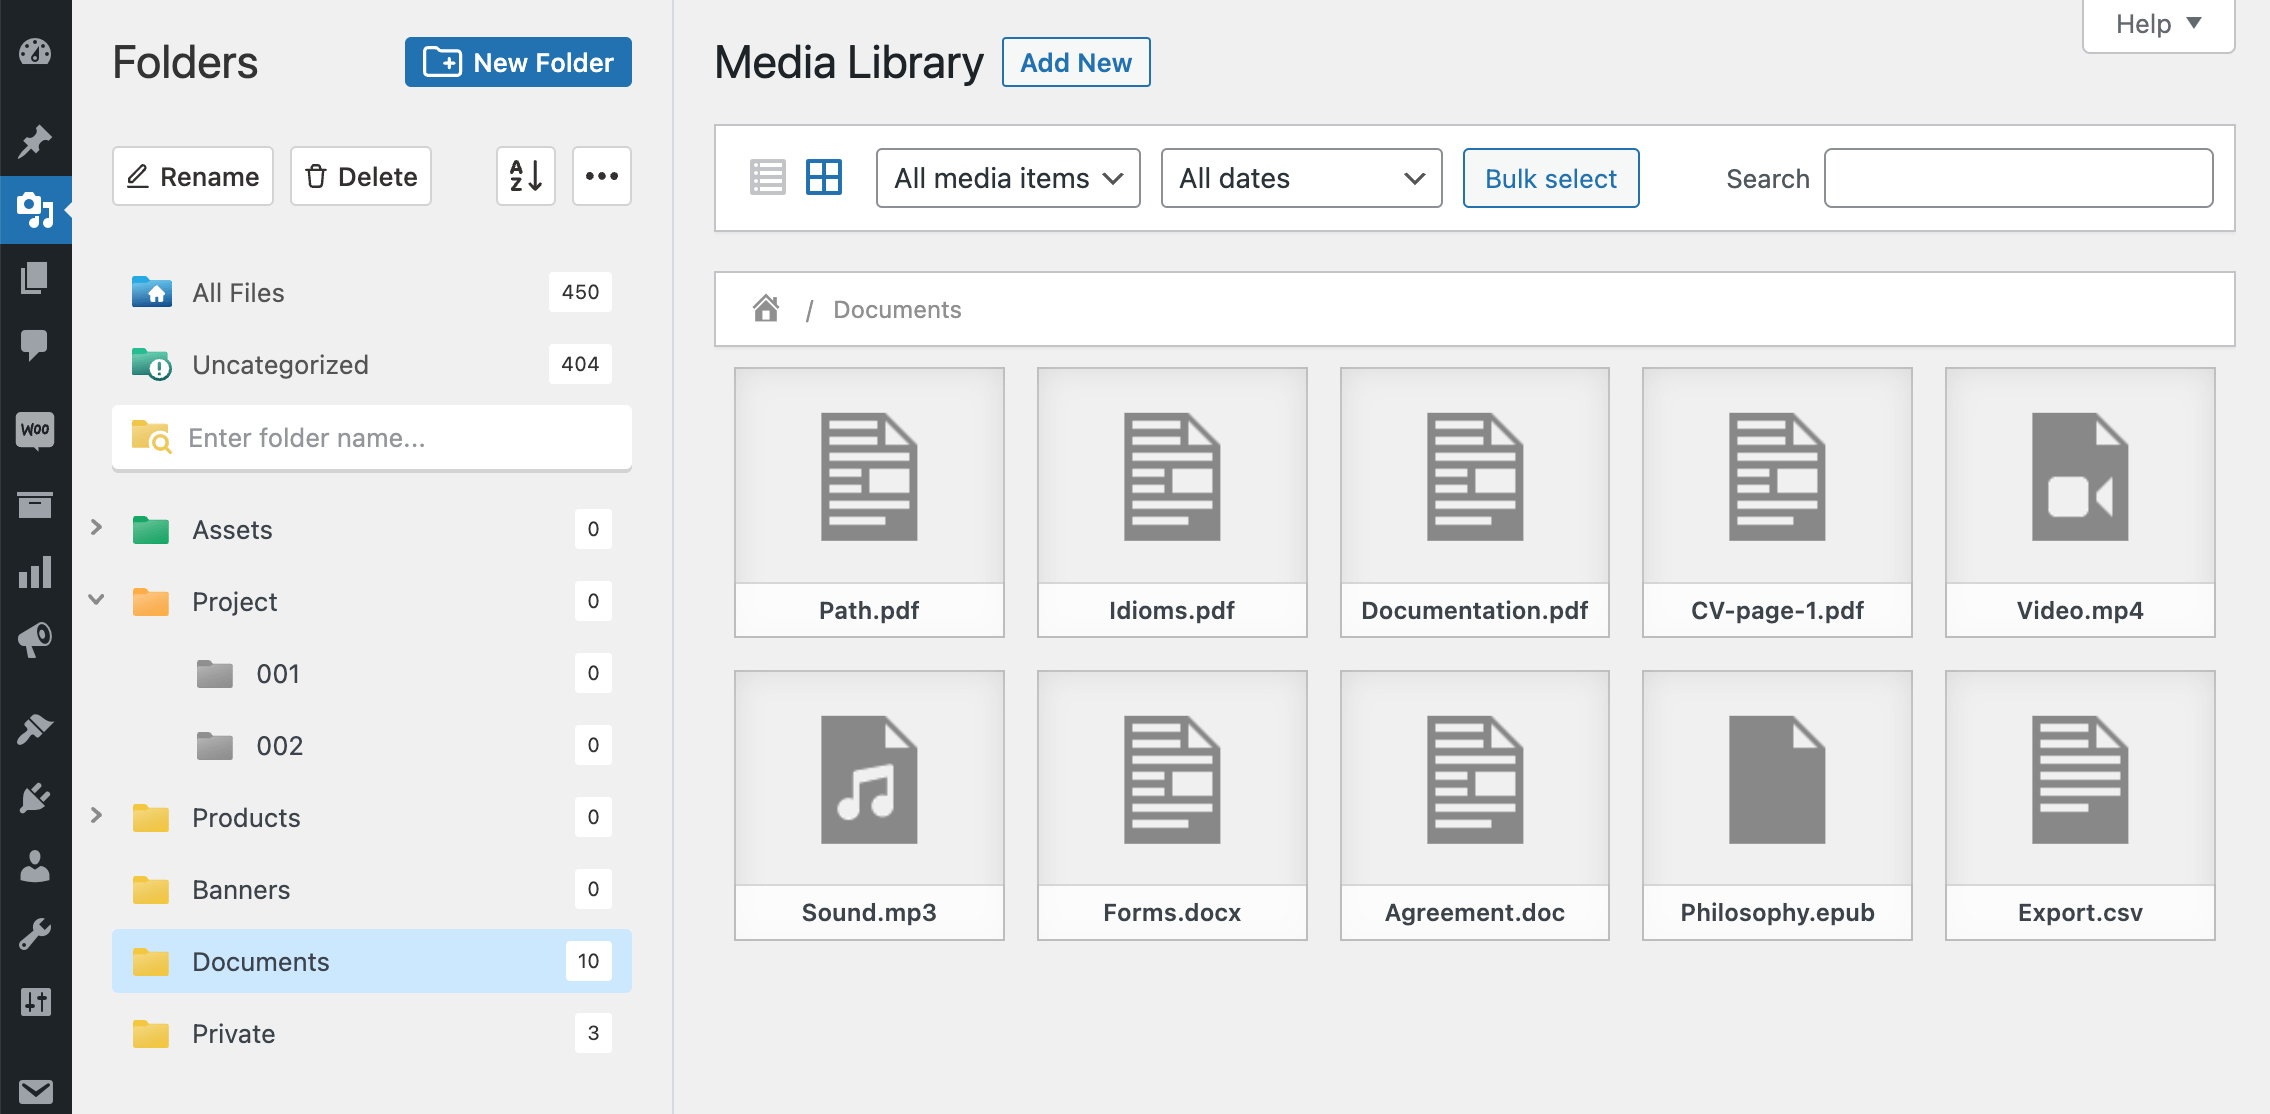
Let’s start by categorizing your uploaded document attachments. It can be done very easily thanks to FileBird’s drag-and-drop user interface and smart context menu.
2. Install FileBird Document Library plugin
FileBird Document Library is a free plugin to help you showcase your document category on your WordPress page/post. So please install and activate this plugin on your WordPress site.
3. Add the Gutenberg Document Library Block – and Done!
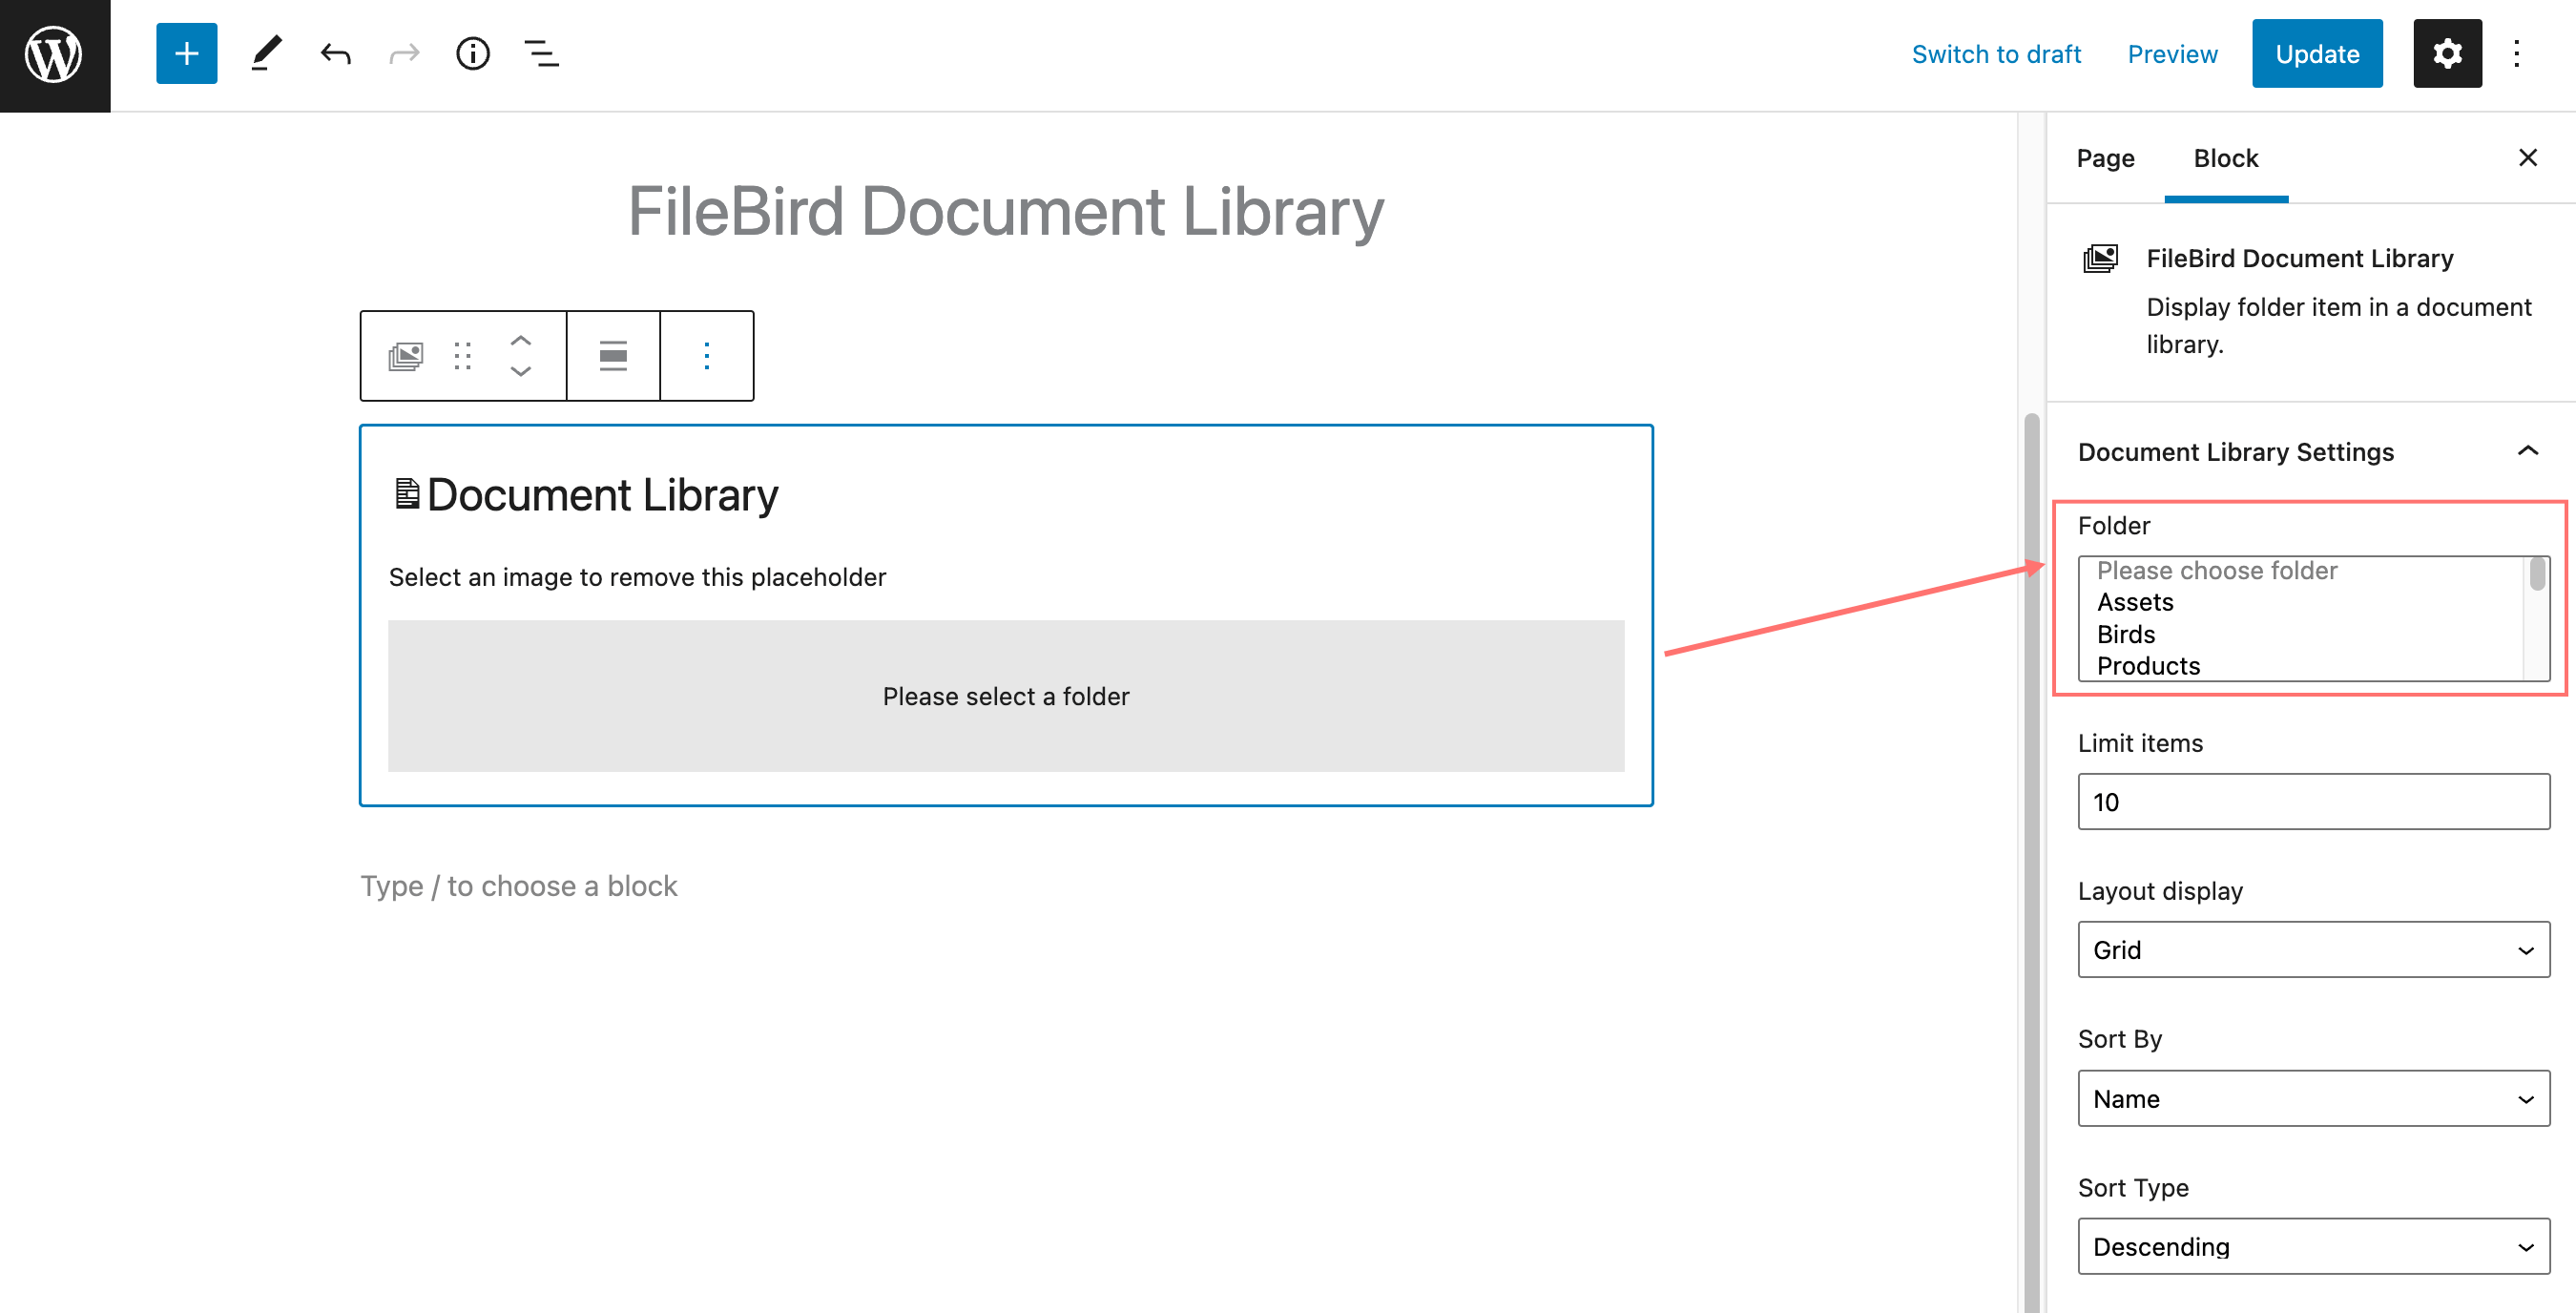
Search for “FileBird Document Library” and add it to your current page.
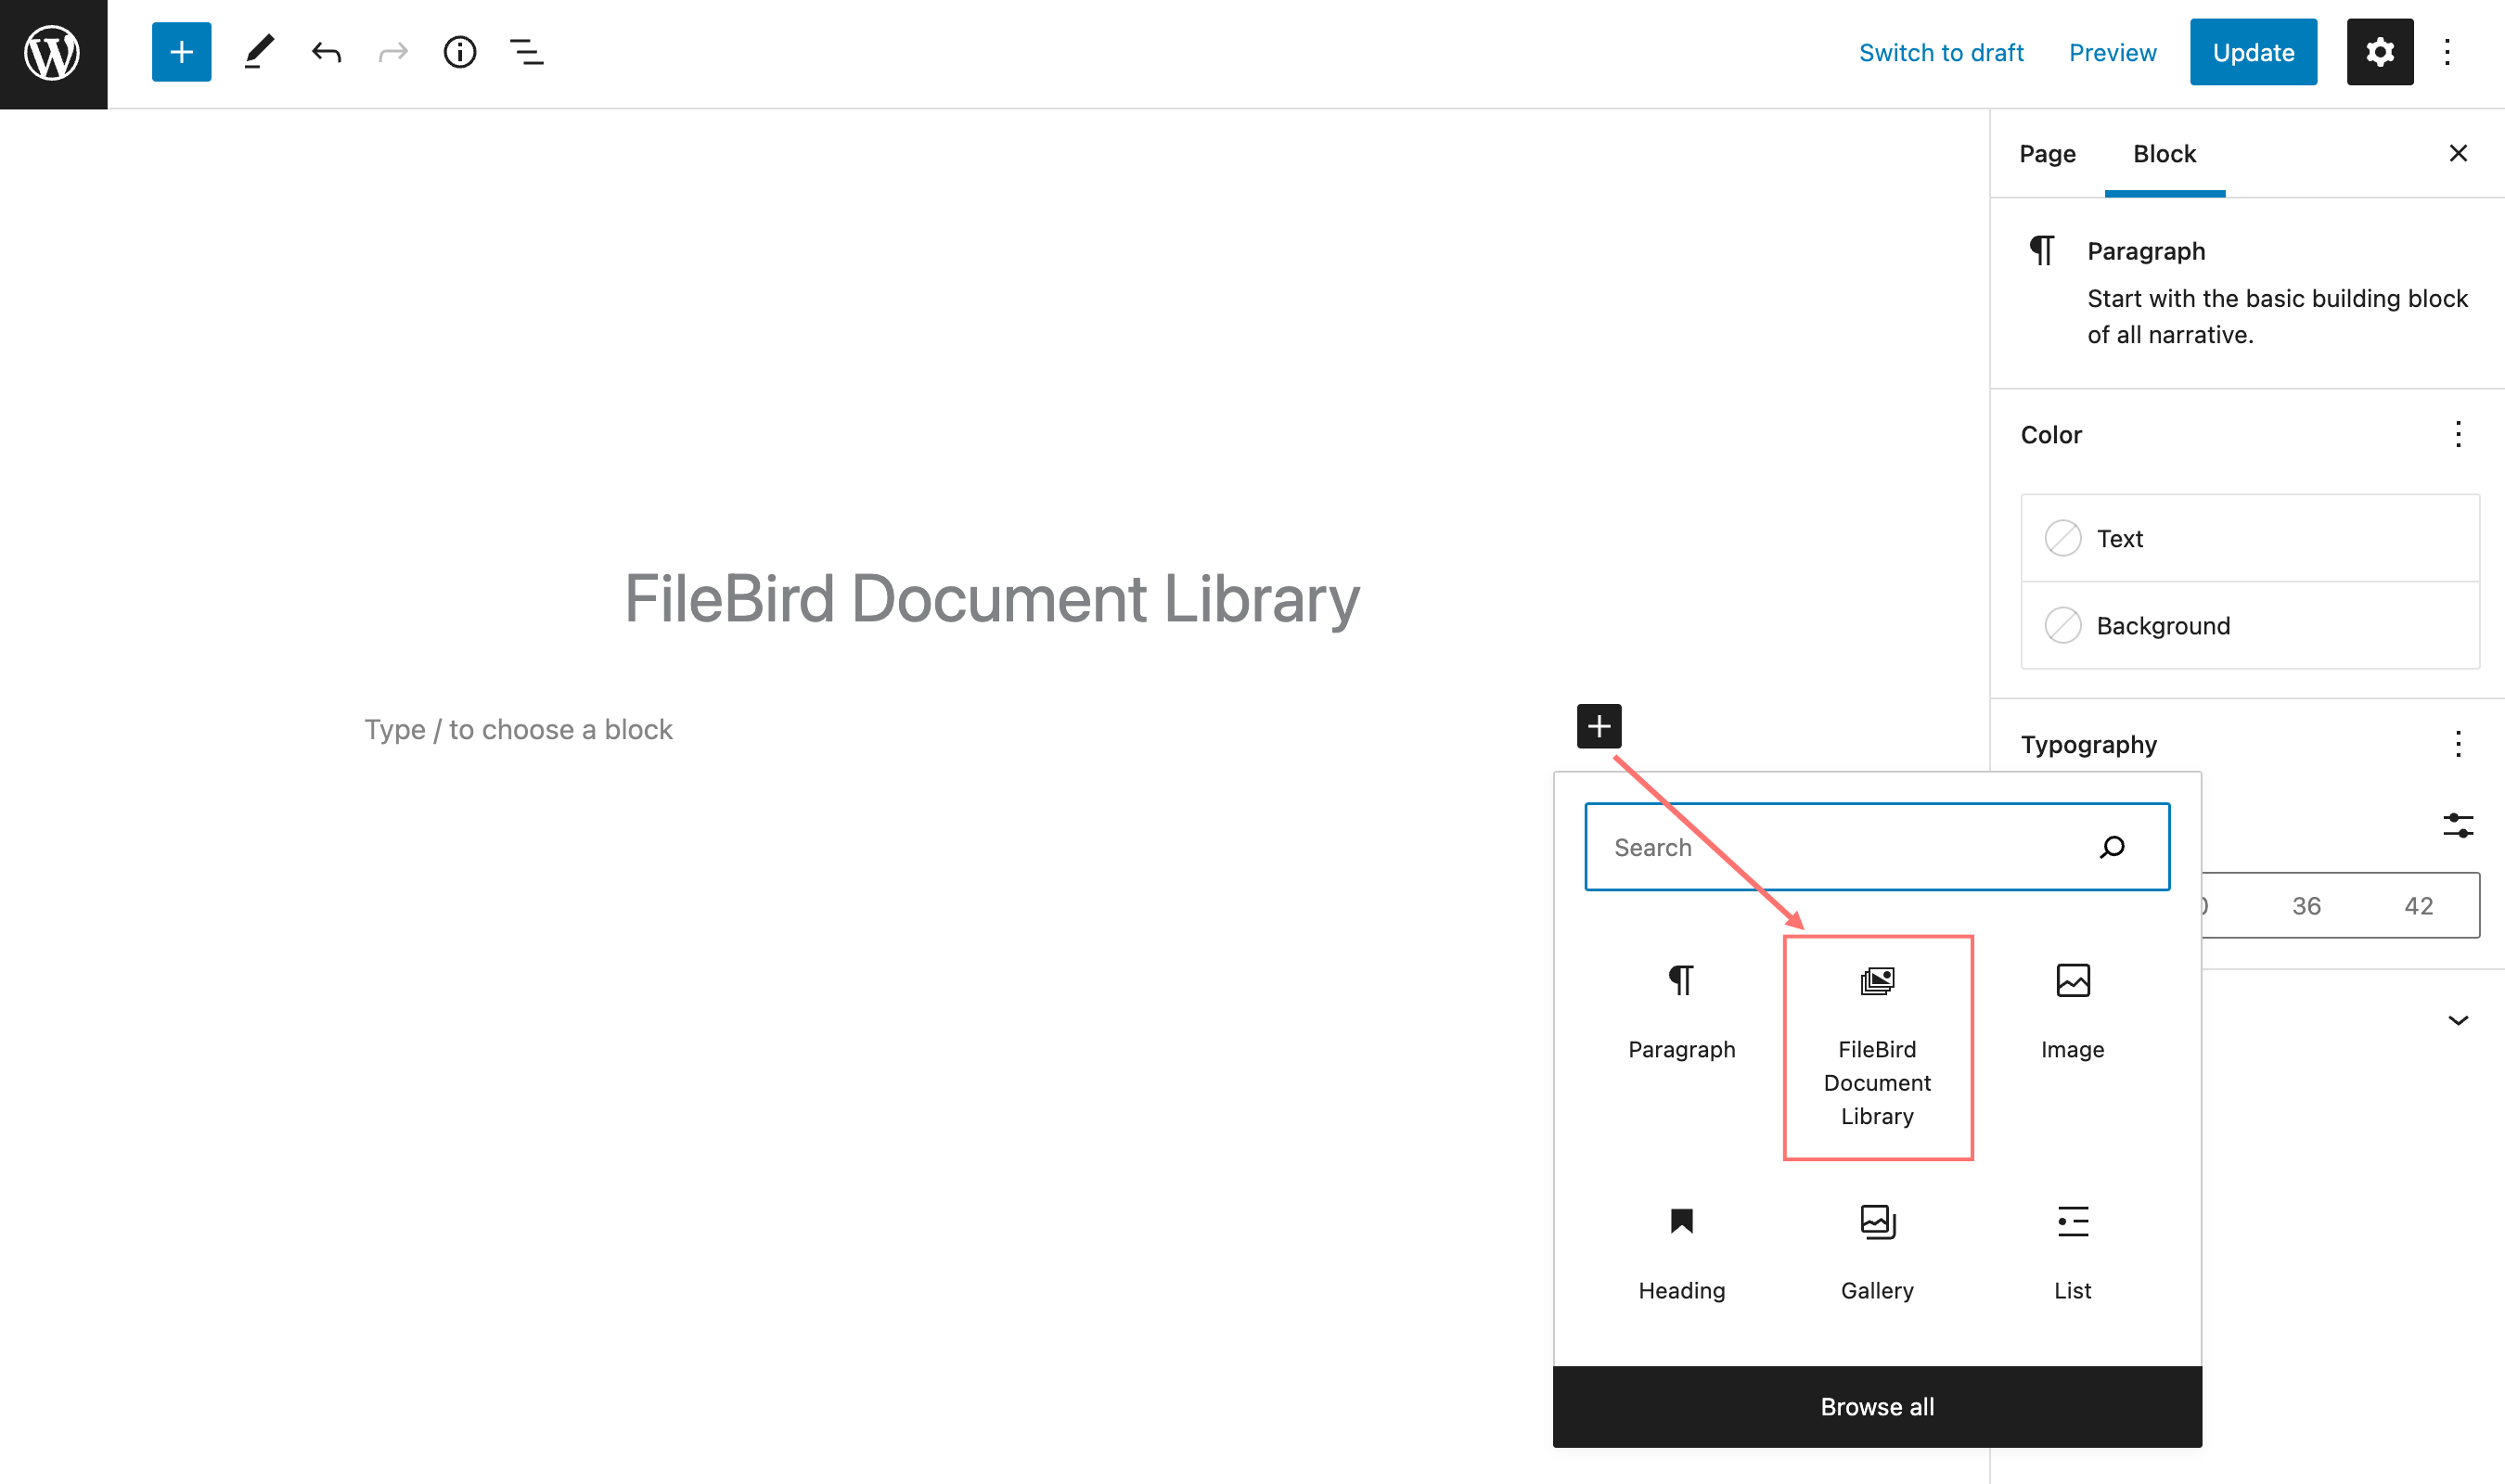
On the left settings panel, you can choose a single folder, alternatively, hold Ctrl or Shift to select multiple folders. There are various built-in options to help you display the library layout in the perfect design for your web styling. So feel free to play around with pagination, number of document items per page, sort type, sort by, and so on.
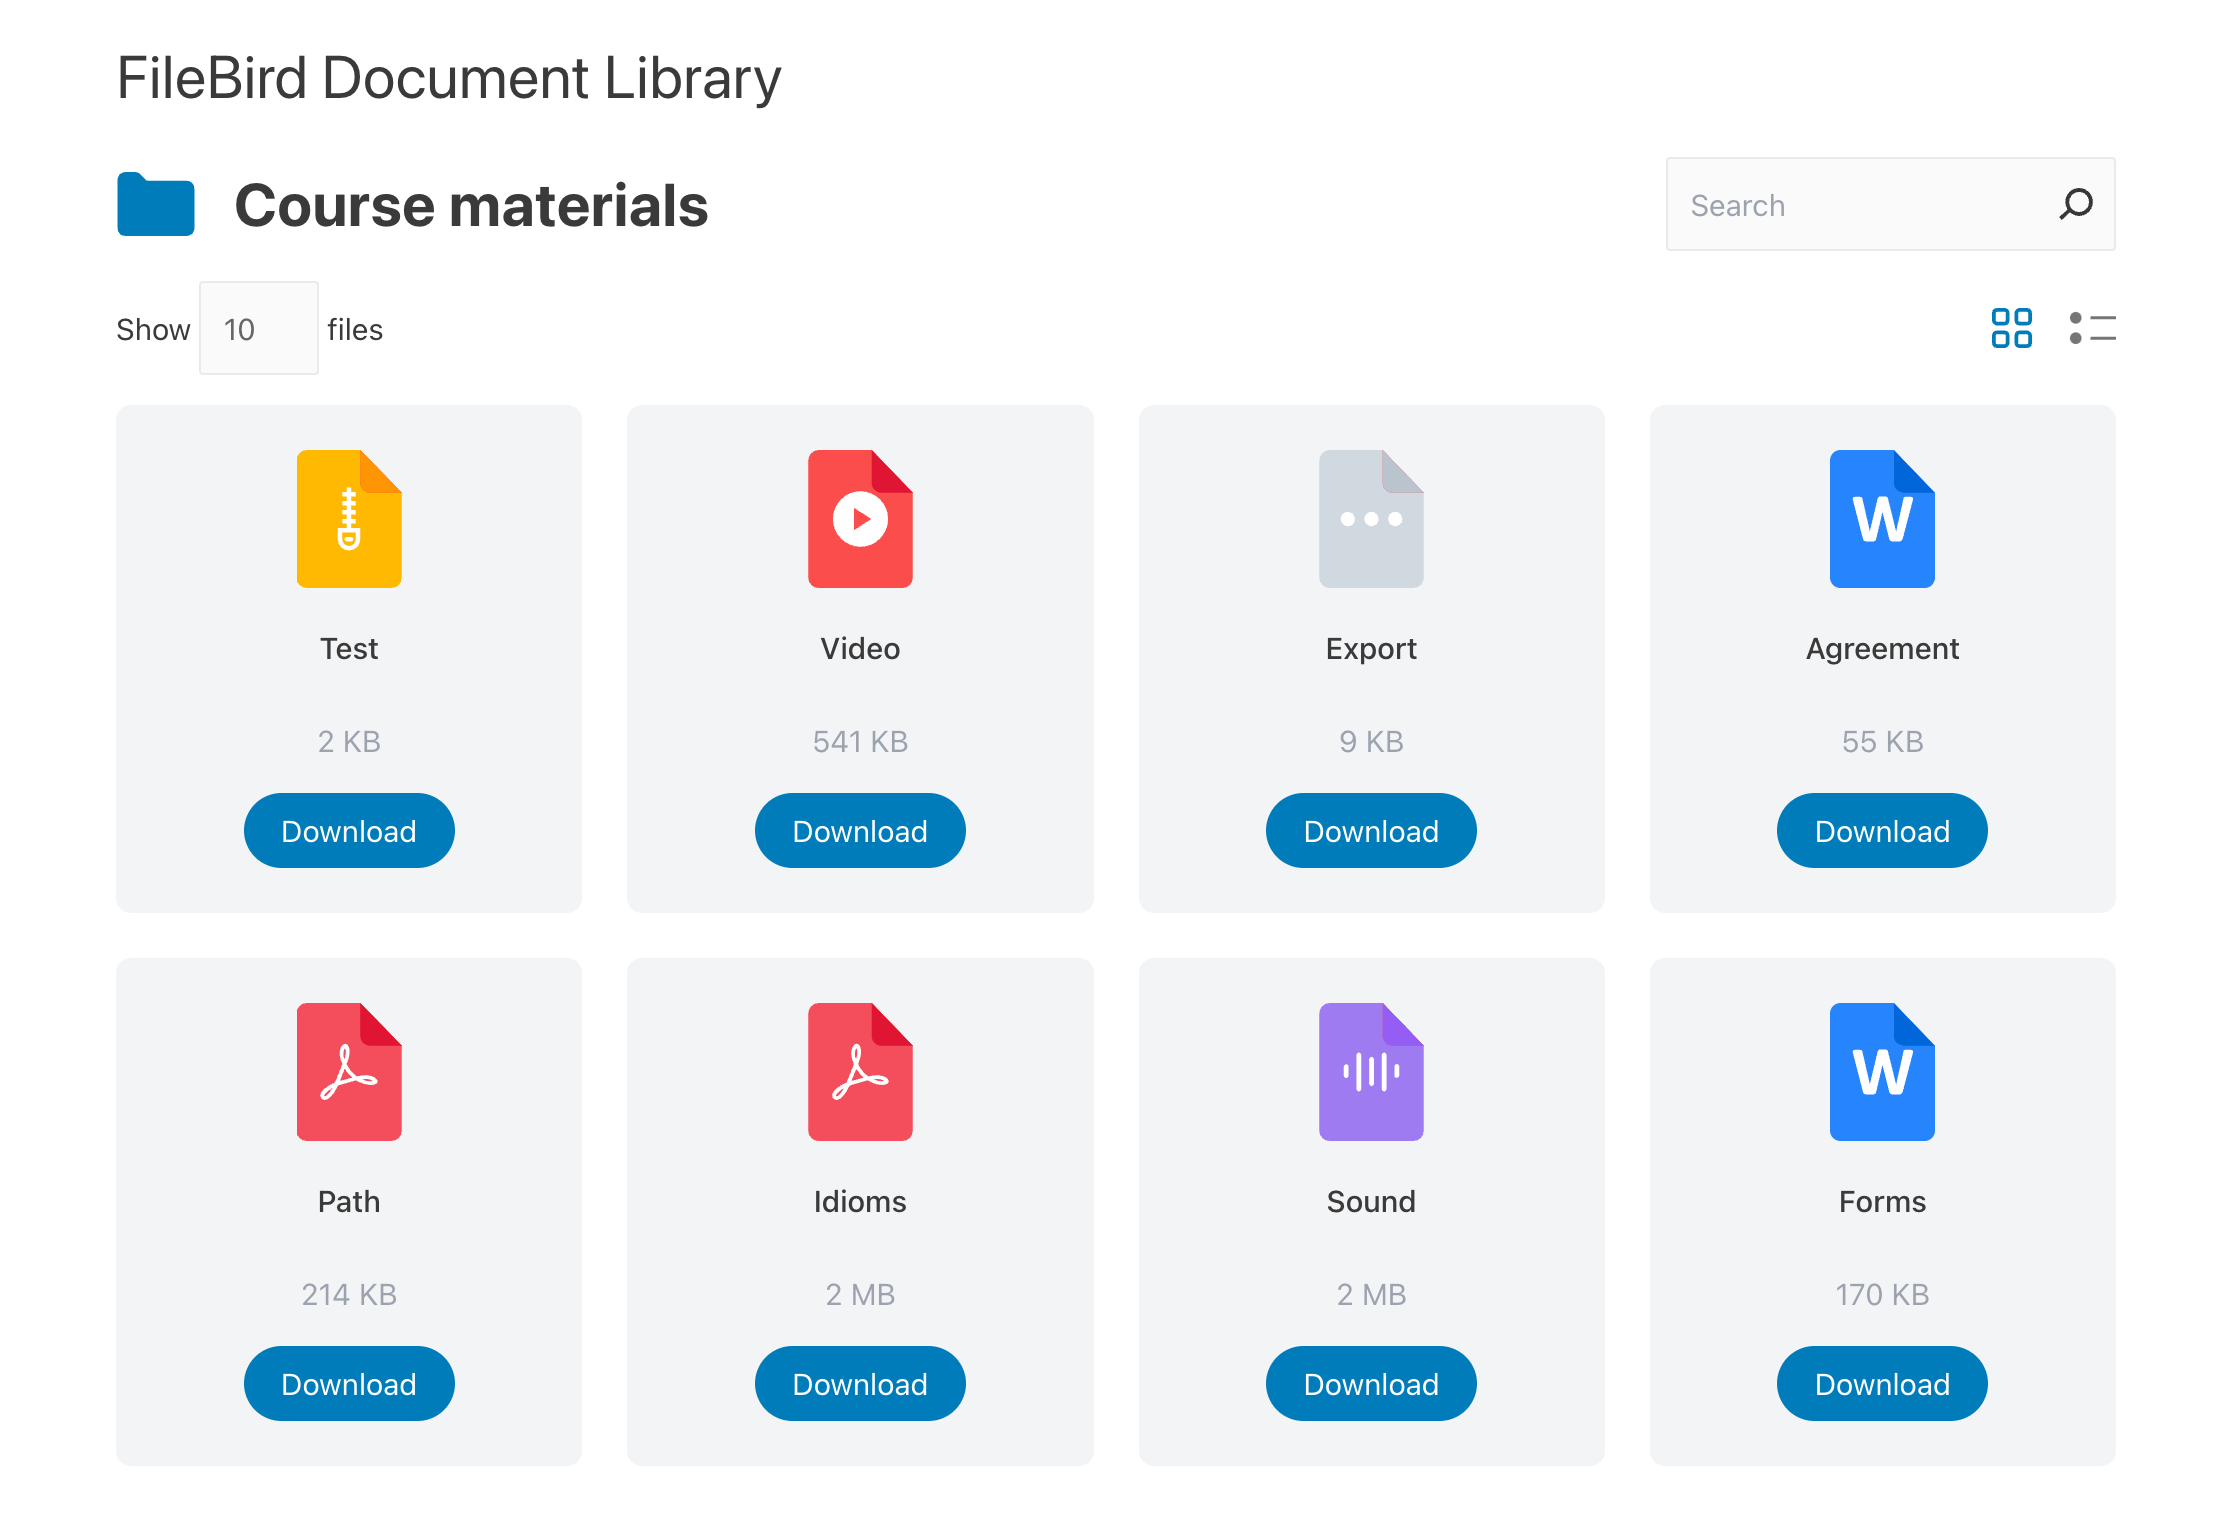
Those folders will then output the list of document files. If you choose to publish the library as a grid gallery, then the page looks like this on the front end.
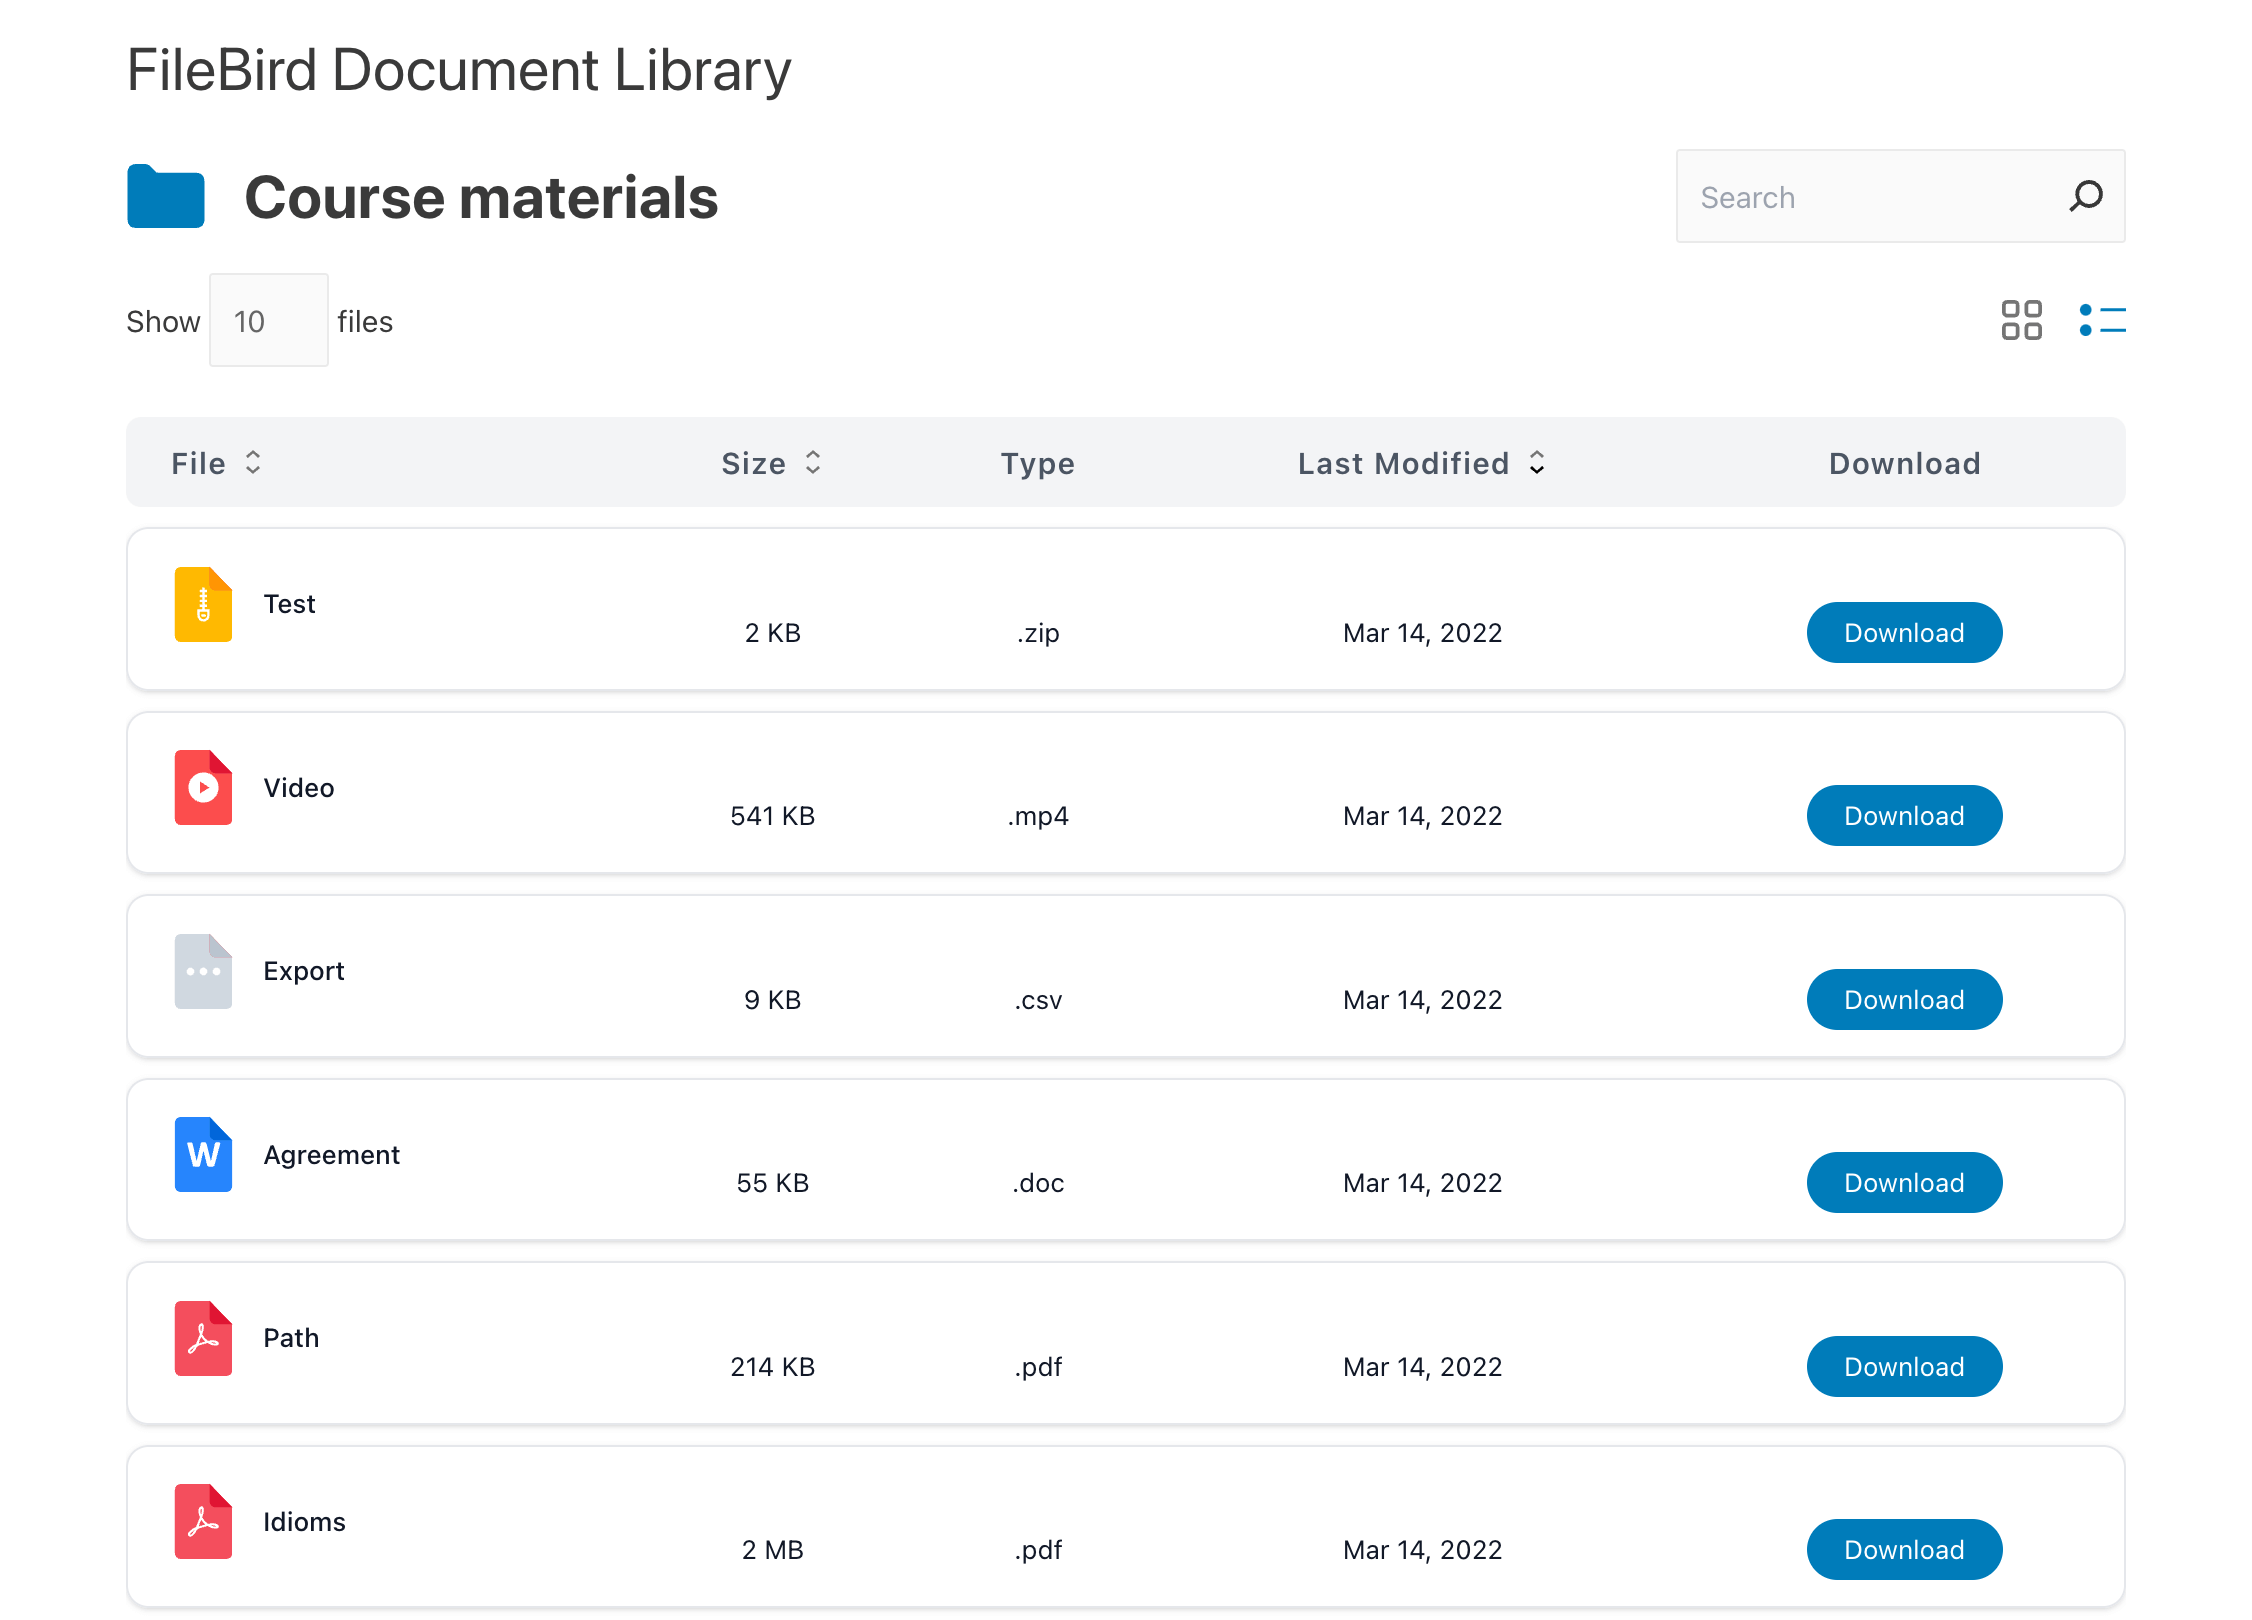
If you want to publish the library as a list table, then here’s how the end result of your published page looks.
Great, this little task is done now! I hope you’re able to achieve the look and feel you’ve always wanted for your document gallery. :)
Alternative Ways to Publish a Document Library
Create a Document List in WordPress
If you manually add a document to a WordPress page or post, all it shows is the file name which is also linked to that file’s URL or download link.
A document file without its thumbnail makes it less appealing and fewer people will click it.
Here’s a document with its link.

In Gutenberg, you can make it look a bit better by using the File block. This is how it looks when I use File blocks to add documents one by one.
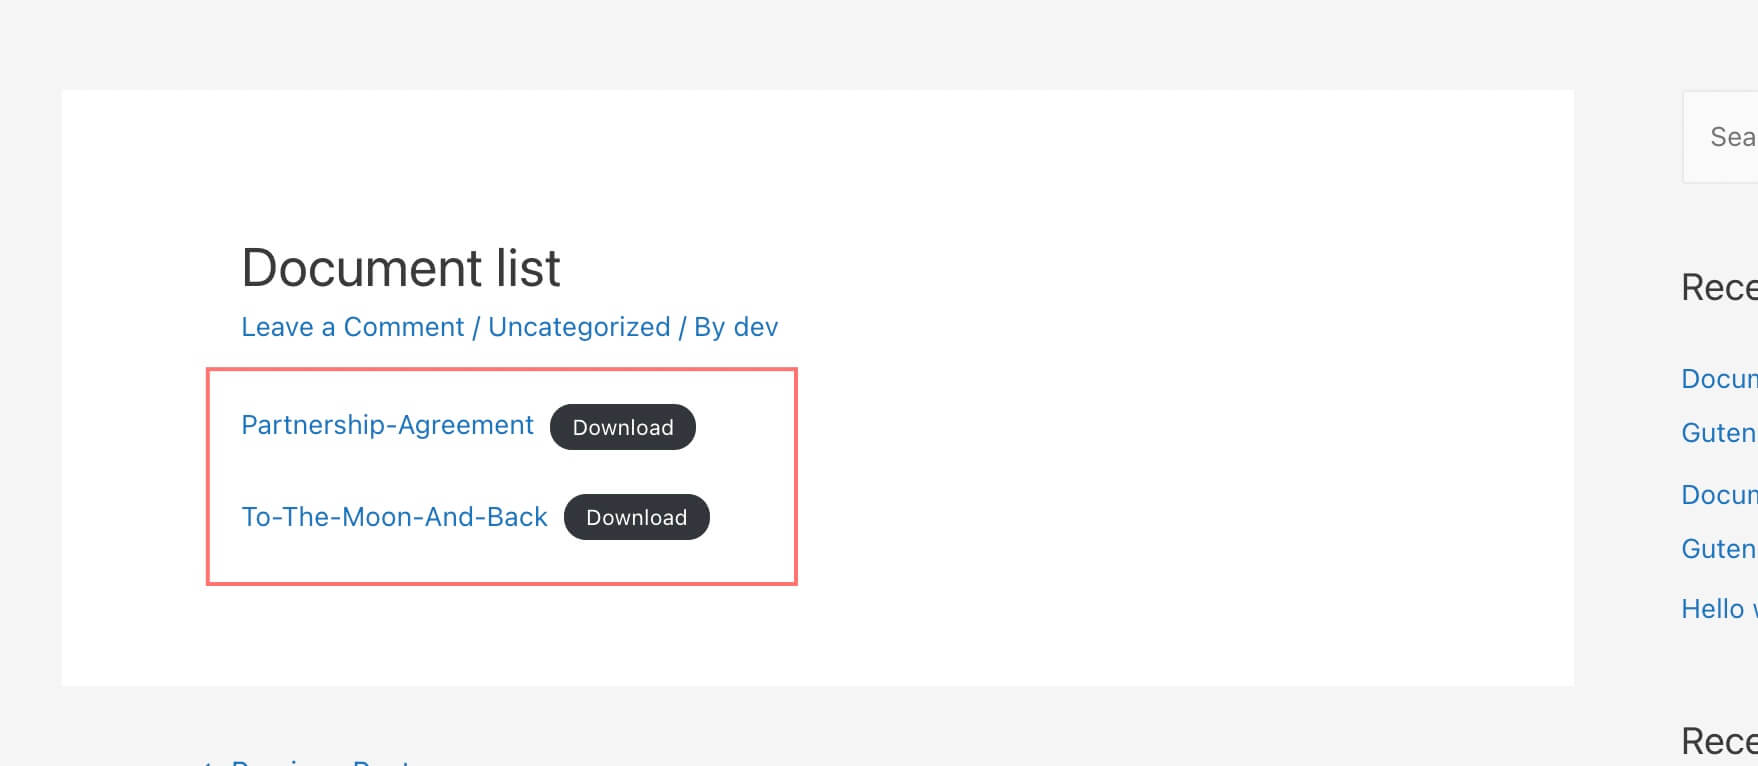
That’s all you can do within WordPress default.
Fortunately, there’s a plugin to help you enhance the document gallery with thumbnails for each file type and also provides multiple options to display them in a good-looking showcase.
Now think about which page/post editor you’re currently using because Gutenberg editor takes some different aspects from the classic editor. Following are the guidelines for these 2 different WordPress page/post editors.
Create a Document Gallery in Classic Editor
Required plugins: Document Gallery
In order to add a well-aligned gallery of documents in WordPress classic editor, all you need is the plugin Document Gallery by Dan Rossiter. Just download and install it for free from the WordPress repo.
1. Navigate in Document Gallery plugin
Upon activation, you’ll see a new menu Document Gallery created under Settings menu. That is where you head over to when you need to adjust advanced settings.
In the scope of this tutorial, you don’t need to dive into it too much as this plugin actually allows convenient access right from the WordPress page/post editor.
2. Add Media to your document library
When editing any page or post, click Add Media > Create Document Gallery > select all necessary document files > Create a New Document Gallery.
3. Set up links, layouts, and thumbnails
Next, you’ll be seeing the setup part for this gallery.

You would want to care about these settings:
- Link To: choose Media File if you want the users one-click to download, or Attachment Page if you want to direct users to the file page.
- Columns: how many columns you want your gallery to display in
- Use auto-generated document thumbnails
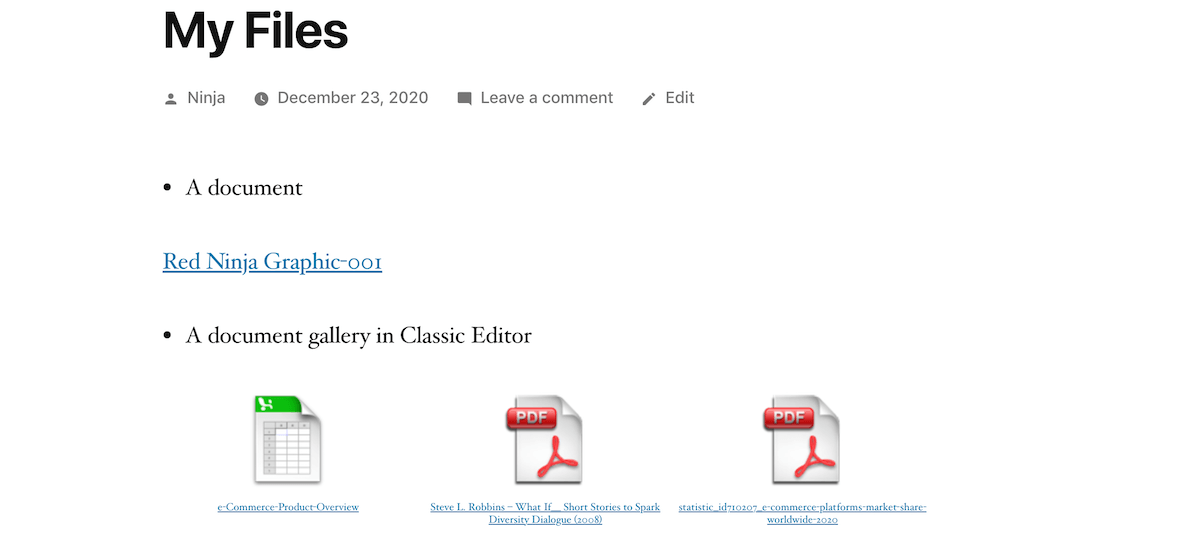
Then you click Update to save all the changes. This is how your 3-column document gallery looks on the front-end.
Create a Document Gallery in Gutenberg Editor
Like it or not, Gutenberg is enforced and will likely replace the Classic editor in a few years. The fact that many clients really enjoy using Gutenberg blocks makes sense for us to keep it updated with the right Gutenberg-friendly plugins.
Below is the tutorial on how to use Document gallery for Gutenberg users.
Required plugins: Document Gallery & FileBird
For those who are not familiar with FileBird, it is a WordPress media organizer that comes with a great Gutenberg image gallery block. Now FileBird v4.3.1 and its later releases also support document gallery block via dg shortcode (Document Gallery plugin supported shortcode).
1. Organize document files in a folder
After activating those two plugins, navigate to your Media library and upload your document files to a folder. If your files were already uploaded, just bulk select and drag n’ drop them to the destination folder.
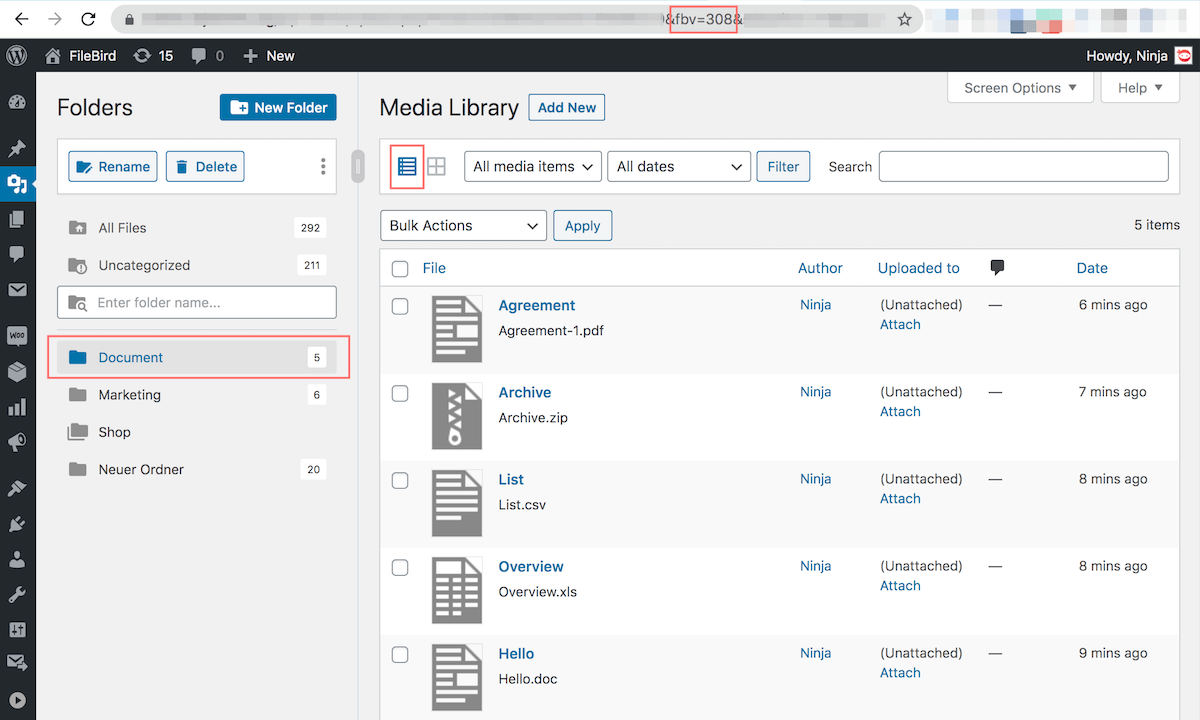
Here I’ve renamed the folder as Document and placed it on the top of the folder tree for easy view.
2. Look for the folder ID
In the media library’s List mode, select that Document folder and look into its URL. You’ll see fbv=folderid. Refer to the screenshot above, fbv=308 meaning the folder ID is 308.
3. Paste the document display shortcode to your page/post
[dg id=-1 fbv=308]
To display this document folder in a page or post using Gutenberg editor, you add this shortcode along with the folder ID:

This shortcode pulls the document gallery settings and applies them to this FileBird folder to help those contained documents display on the Gutenberg front-end.
Just as simple as that, when published, your new WordPress document gallery looks like this.
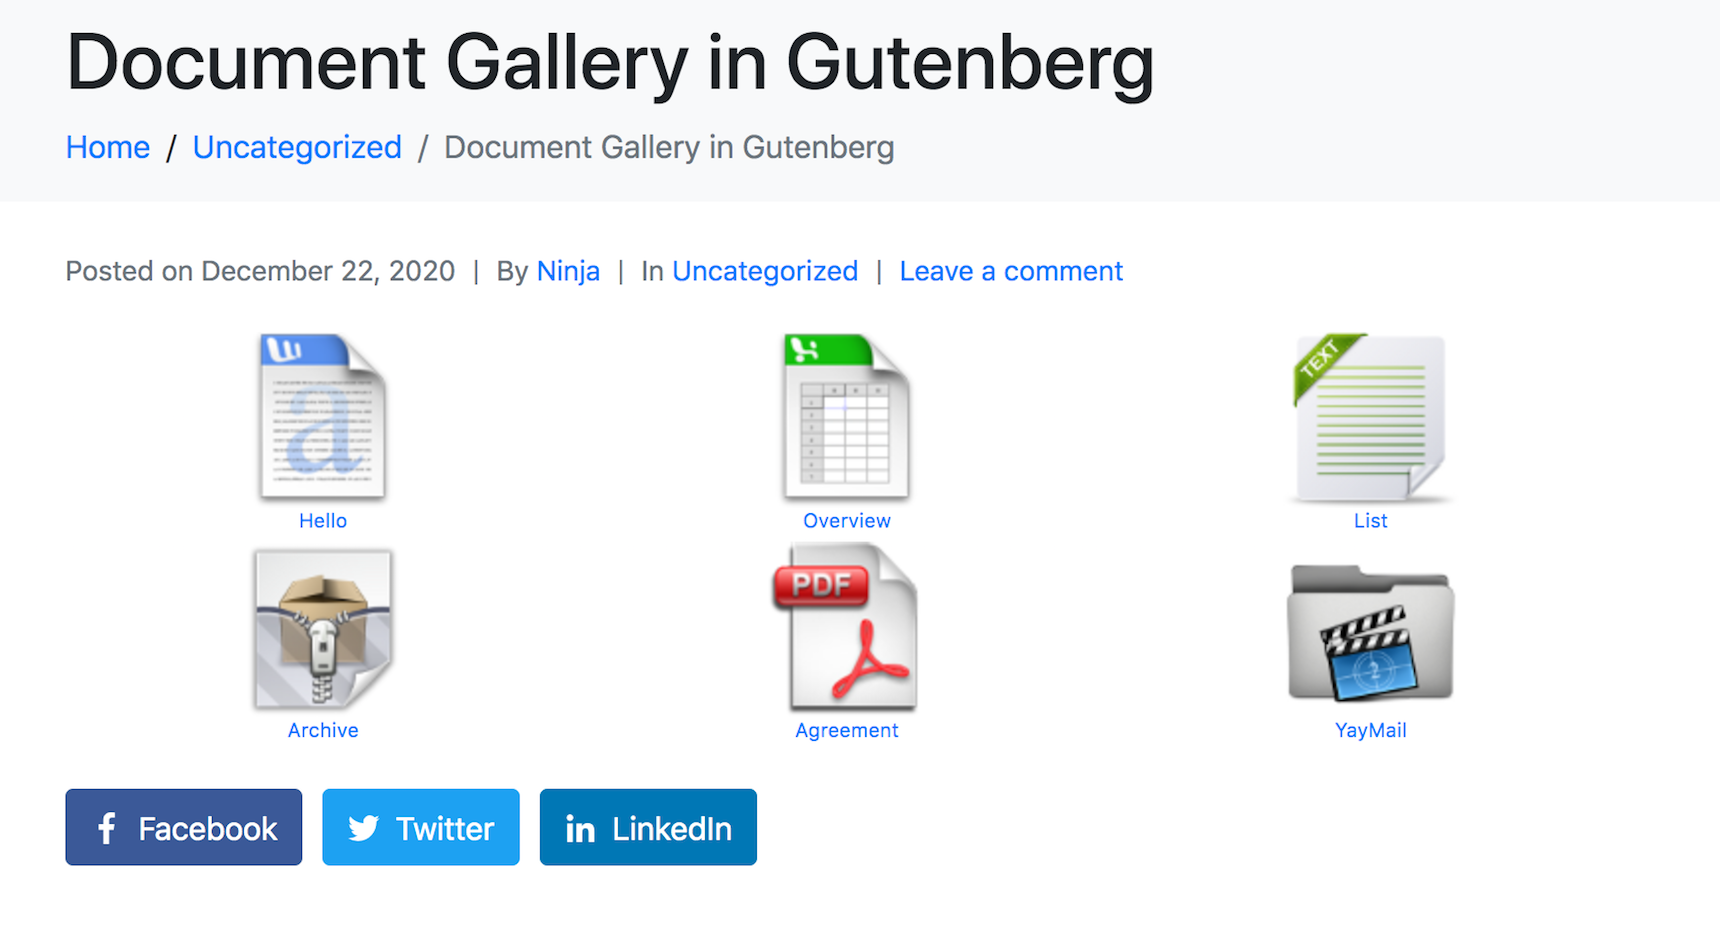
As you can see, there are some workarounds to creating a document library for your WordPress website. If you want to have predesigned icons/thumbnails for your file types, just use FileBird Document Library Pro. It is ultralight and works seamlessly with Gutenberg. It also comes with a shortcode to work with other WordPress page builders and themes editors.
Final Thoughts
This article aims to demonstrate all the steps you have to take to upload extra file types and create a nice document gallery in WordPress with auto-generated thumbnails.
If you are already familiar with Gutenberg, setting up the Document Library with FileBird plugin will be a solid solution. And it is totally free!
DOWNLOAD DOCUMENT LIBRARY PLUGINShould you have a better solution, don’t hesitate to leave your opinion in the comment box or chatbox below.
We hope you can get it done in no time. Can’t wait to see your document gallery published!

